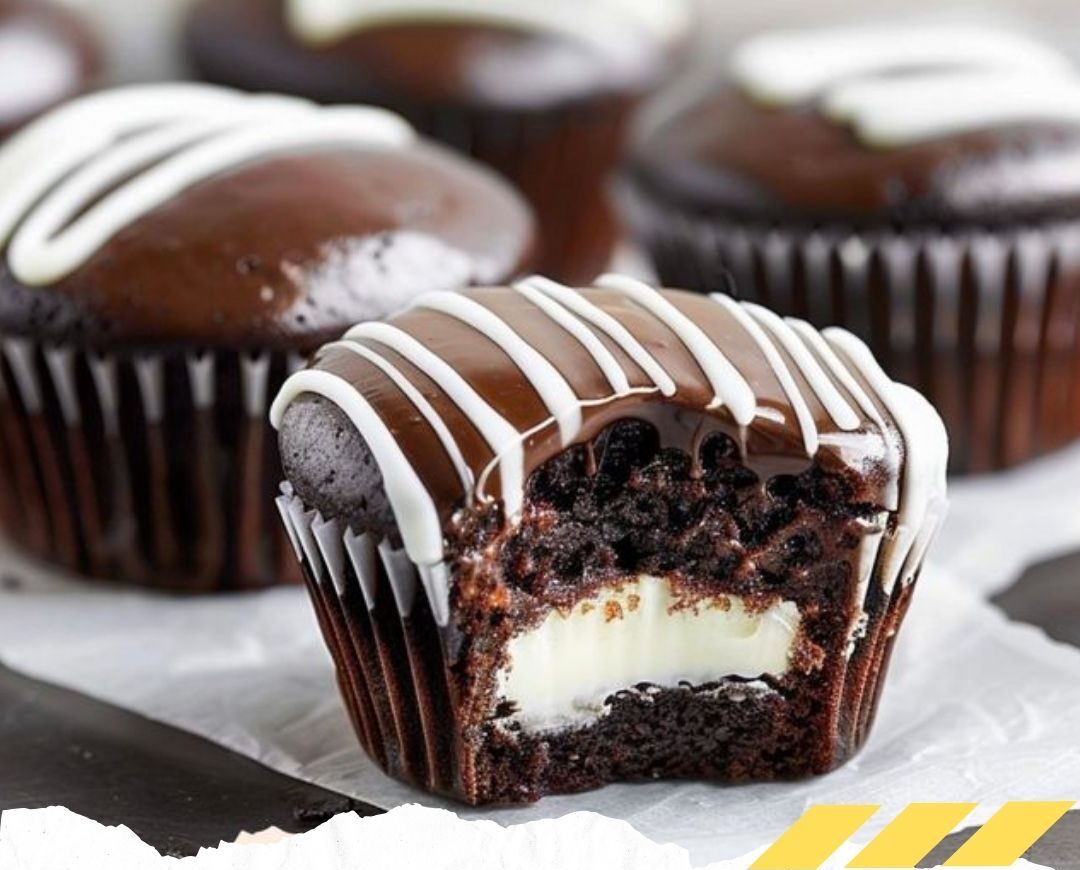
There’s something magical about biting into a Homemade Hostess Cupcake. The moment your teeth sink into that soft chocolate cake, followed by a surprise cloud of creamy filling and a smooth chocolate ganache on top, you know you’re in dessert heaven. These cupcakes are like tiny chocolate treasure chests—simple on the outside but full of sweet secrets inside.
If you grew up loving those classic Hostess snack cakes, get ready for a nostalgic baking journey. And if you’ve never tried one, think of it like a chocolate hug with a sweet surprise tucked into the center. Best of all, when you make them at home, you control the ingredients, the flavors, and that generous amount of filling we always wished came in the store-bought version!
Before we dive into the magic, let’s break everything down in a fun and organized way.
Prep Time, Cook Time & Servings
| Details | Time/Quantity |
|---|---|
| Prep Time | 20 minutes |
| Cook Time | 18–20 minutes |
| Total Time | About 40 minutes |
| Servings | 12 cupcakes |
Ingredients
For the Chocolate Cupcakes:
1 cup all-purpose flour
1/2 cup unsweetened cocoa powder
1 cup granulated sugar
1 teaspoon baking powder
1/2 teaspoon baking soda
1/2 teaspoon salt
1/2 cup milk
1/4 cup vegetable oil
1 large egg
1 teaspoon vanilla extract
1/2 cup boiling water
For the Cream Filling:
1/2 cup unsalted butter, softened
2 cups powdered sugar
1/2 teaspoon vanilla extract
2 tablespoons heavy cream
For the Chocolate Ganache:
1 cup semi-sweet chocolate chips
1/2 cup heavy cream
2 tablespoons unsalted butter
Instructions
Preheat the oven to 350°F (175°C). Line a muffin tin with cupcake liners.
In a large mixing bowl, sift together the flour, cocoa powder, granulated sugar, baking powder, baking soda, and salt.
Add the milk, vegetable oil, egg, and vanilla extract to the dry ingredients and beat on medium speed for 2 minutes.
Stir in the boiling water until the batter is well combined. The batter will be thin.
Fill each cupcake liner about two-thirds full with batter.
Bake for 18-20 minutes, or until a toothpick inserted into the center of a cupcake comes out clean.
Remove from the oven and allow the cupcakes to cool in the pan for 5 minutes before transferring them to a wire rack to cool completely.
To make the cream filling, beat the softened butter in a medium mixing bowl until smooth.
Gradually add the powdered sugar and vanilla extract, beating until smooth and creamy.
Add the heavy cream and beat on medium-high speed for 2 minutes, until light and fluffy. Transfer the filling to a piping bag fitted with a round tip.
Once the cupcakes are completely cooled, insert the tip of the piping bag into the center of each cupcake and gently squeeze to fill with cream.
To make the chocolate ganache, place the chocolate chips in a heatproof bowl.
In a small saucepan, heat the heavy cream and butter over medium heat until it begins to simmer. Pour the hot cream mixture over the chocolate chips and let sit for 2-3 minutes.
Whisk the chocolate and cream until smooth and glossy.
Let the ganache cool slightly before spooning it over the filled cupcakes. Allow the ganache to set before serving.
Enjoy!
Why Make Your Own Homemade Hostess Cupcakes?
Why bother making them at home when you could just buy a box at the store? Three big reasons:
⭐ Better taste – richer chocolate, fresher cream, real ingredients
⭐ More filling – no tiny little dab of cream here; we go generous
⭐ No preservatives – just pure deliciousness you can trust
Ingredients Overview
Think of the ingredients like a small baking orchestra—each one plays a role in creating that perfect harmony of flavor and texture.
Dry Ingredients
Flour builds structure, cocoa adds rich chocolate flavor, sugar sweetens, and baking agents help the cupcakes rise.
Wet Ingredients
Milk and oil keep the cake moist, the egg binds everything, and vanilla brings a warm flavor note.
The Surprise Filling
Similar to a fluffy vanilla cloud—soft, airy, and lightly sweet.
Ganache
Smooth as velvet and shiny like a chocolate mirror.
Expert Tips for Perfect Hostess Cupcakes
✔ Don’t skip sifting—it’s key for a fluffy crumb
✔ Don’t overbake or cupcakes will dry out
✔ Cool completely before filling—warm cupcakes melt the cream
✔ Let the ganache thicken before topping so it doesn’t run off
Storage and Make-Ahead Tips
Fridge: Store in an airtight container up to 4 days
Freezer: Freeze unfilled cupcakes up to 2 months
Make-ahead: Ganache and cream filling can be made 24 hours early
Flavor Variations
Try fun twists:
🍫 Mint chocolate filling – add peppermint extract
☕ Mocha cupcakes – add 1 tsp instant coffee to batter
🥜 Peanut butter filling – mix peanut butter with cream filling
🍓 Strawberry version – add strawberry jam center
Serving Suggestions
Perfect for:
🎉 Birthday parties
☕ Coffee dates
🍽 Weekend desserts
🥡 Homemade gifts
Common Mistakes to Avoid
⛔ Overmixing the batter
⛔ Filling the liners too full
⛔ Skipping cooling time
⛔ Using low-quality chocolate
Conclusion
Homemade Hostess Cupcakes are more than just a dessert—they’re a bite of childhood, a moment of joy, and a sweet reminder that simple things can be extraordinary. With moist chocolate cake, a creamy surprise center, and silky ganache, these cupcakes are a showstopper for any occasion.
So roll up your sleeves, grab your whisk, and treat yourself. You deserve it.
FAQs
1. Can I use a different type of chocolate for the ganache?
Yes, dark or milk chocolate both work depending on your preference.
2. Can I fill the cupcakes without a piping bag?
Yes, you can cut a small cone out of the center, fill it, and replace the top.
3. Do I have to use vegetable oil?
No, you can substitute melted butter, but the cupcakes may be slightly denser.
4. Can I make these cupcakes gluten-free?
Yes, use a 1:1 gluten-free flour blend for best results.
5. How do I know when the cupcakes are done?
Insert a toothpick into the center—if it comes out clean or with a few crumbs, they’re ready.