Introduction
If you’ve ever craved a dessert that feels comforting, nostalgic, and ridiculously easy to make, Rice Krispie Peanut Butter Balls are about to become your new favorite treat. They’re the kind of snack that disappears faster than you expect—like socks in a dryer. Crunchy cereal, creamy peanut butter, and smooth chocolate come together in perfect harmony, all without turning on the oven.
Whether you’re making treats for a party, a holiday platter, or just a quiet night at home, this recipe checks all the boxes. It’s quick, affordable, and friendly for beginner cooks. And honestly, who doesn’t love something you can roll into a ball and dip in chocolate? Let’s dive into everything you need to know about these irresistible bites.
Table of Contents
| Sr# | Headings |
|---|---|
| 1 | What Are Rice Krispie Peanut Butter Balls |
| 2 | Why This Recipe Is So Popular |
| 3 | The Perfect Balance of Texture and Flavor |
| 4 | Ingredients Breakdown |
| 5 | Preparation Time, Cook Time, and Servings |
| 6 | Step-by-Step Instructions Explained |
| 7 | Tips for Perfect Peanut Butter Balls |
| 8 | Chocolate Coating Tips and Tricks |
| 9 | Decoration Ideas and Variations |
| 10 | When to Serve Rice Krispie Peanut Butter Balls |
| 11 | Storage and Shelf Life |
| 12 | Make-Ahead and Freezing Options |
| 13 | Common Mistakes to Avoid |
| 14 | Why Kids and Adults Love This Recipe |
| 15 | Final Thoughts on This Classic Treat |
1. What Are Rice Krispie Peanut Butter Balls
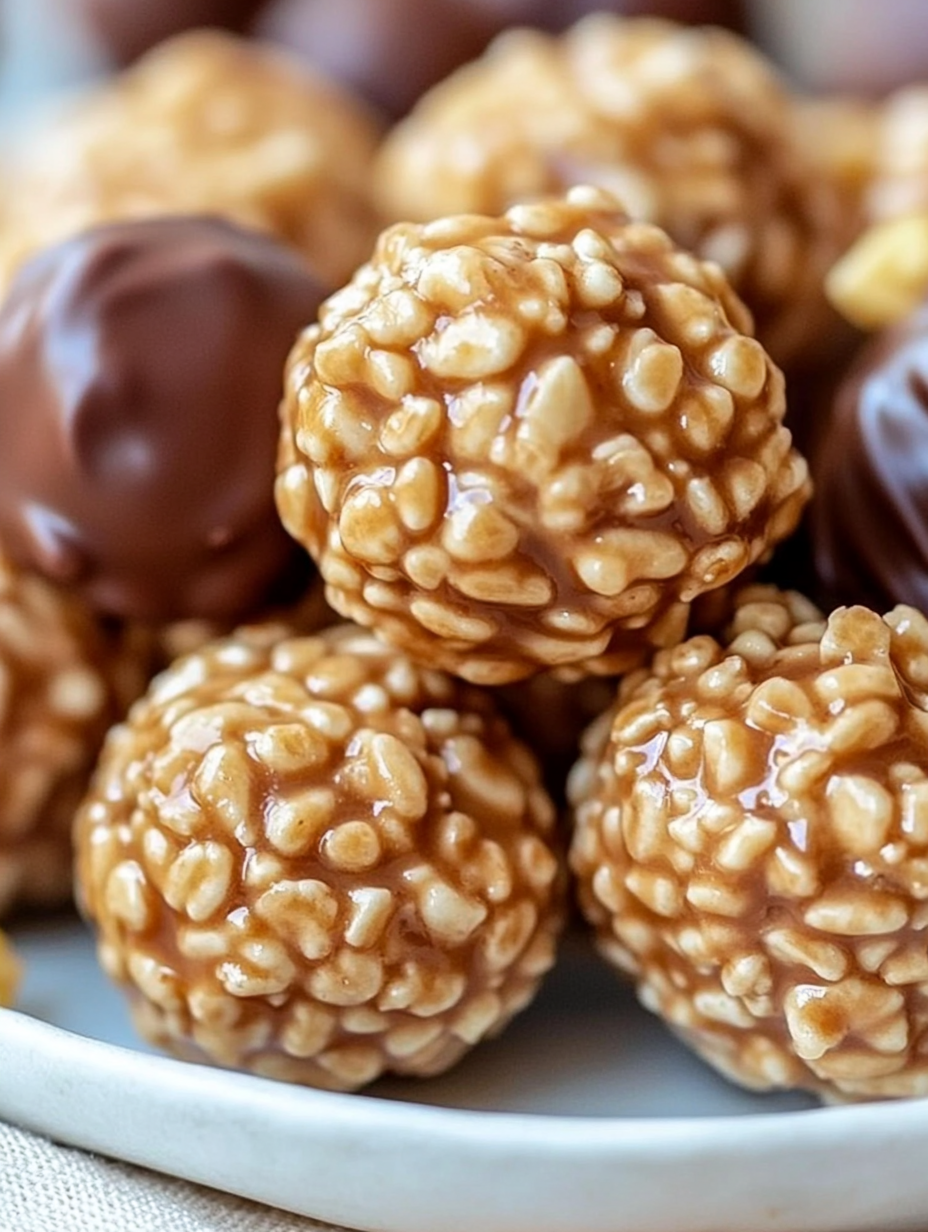
Rice Krispie Peanut Butter Balls are no-bake dessert bites made from crispy cereal, peanut butter, powdered sugar, and butter, all coated in melted chocolate. Think of them as the bite-sized cousins of classic Rice Krispie treats—only richer, creamier, and dipped in chocolate for good measure.
They’re often compared to peanut butter balls or buckeyes, but the cereal adds a delightful crunch that sets them apart. Each bite is a mix of soft, crunchy, sweet, and slightly salty goodness.
2. Why This Recipe Is So Popular
There’s a reason these treats show up at holidays, bake sales, and family gatherings year after year. Rice Krispie Peanut Butter Balls are:
No-bake and beginner-friendly
Made with pantry staples
Perfect for sharing
Customizable with toppings
Quick to prepare
They’re like that friend who fits in everywhere—casual enough for everyday snacking, yet fancy enough for special occasions once dipped in chocolate.
3. The Perfect Balance of Texture and Flavor
What really makes this recipe shine is balance. The Rice Krispies bring the crunch, the peanut butter adds creaminess, and the powdered sugar sweetens without overpowering. Then comes the chocolate coating, wrapping everything together like a cozy blanket on a cold day.
Every bite offers contrast, which keeps your taste buds interested. It’s not just sweet—it’s satisfying.
4. Ingredients Breakdown
Let’s take a closer look at what goes into these delicious treats. The beauty of this recipe lies in its simplicity.
Ingredients
2 cups Rice Krispies cereal
1 cup creamy peanut butter
1/2 cup powdered sugar
2 tablespoons unsalted butter, melted
1 cup semi-sweet chocolate chips, melted for dipping
Optional: Sprinkles or crushed peanuts for decoration
Each ingredient plays a specific role, and together they create a treat that feels far more special than the sum of its parts.
5. Preparation Time, Cook Time, and Servings
One of the biggest perks of Rice Krispie Peanut Butter Balls is how little time they take.
Preparation Time: 15 minutes
Cook Time: 0 minutes (no baking required)
Chilling Time: 60 minutes
Total Time: 1 hour 15 minutes
Servings: Approximately 20–24 balls
Perfect for last-minute dessert needs or spontaneous sweet cravings.
6. Step-by-Step Instructions Explained
Here’s how everything comes together, broken down in a clear and friendly way.
Instructions
In a large mixing bowl, combine the Rice Krispies, peanut butter, powdered sugar, and melted butter. Stir until the mixture is well combined and sticks together.
Scoop out tablespoon-sized portions and roll them into balls. Place on a parchment paper-lined baking sheet.
Chill the balls in the refrigerator for 30 minutes to firm up.
Once chilled, dip each ball into melted chocolate, using a fork to help coat them evenly. Allow the excess chocolate to drip off before returning them to the baking sheet.
If desired, immediately sprinkle with decorative sprinkles or crushed peanuts while the chocolate is still wet.
Refrigerate the balls for another 30 minutes or until the chocolate has set.
Enjoy!
7. Tips for Perfect Peanut Butter Balls
Want bakery-style results at home? Keep these tips in mind:
Chill before dipping to prevent crumbling
Use parchment paper to avoid sticking
Roll evenly sized balls for a uniform look
Work in batches when dipping in chocolate
Small details make a big difference.
8. Chocolate Coating Tips and Tricks
Melting chocolate might seem simple, but technique matters. Use gentle heat and stir often to avoid scorching. If the chocolate feels too thick, let it cool slightly after melting—it will coat more smoothly.
Using a fork for dipping helps remove excess chocolate and gives a cleaner finish.
9. Decoration Ideas and Variations
This is where creativity shines. While delicious plain, Rice Krispie Peanut Butter Balls love a little flair:
Crushed peanuts for extra crunch
Colorful sprinkles for holidays
Drizzled white chocolate for contrast
Decorating is like dressing up an outfit—it’s optional, but fun.
10. When to Serve Rice Krispie Peanut Butter Balls
These treats fit almost any occasion:
Holiday dessert trays
Birthday parties
Potlucks
After-school snacks
Gift boxes
They travel well and always earn compliments.
11. Storage and Shelf Life
Store your Rice Krispie Peanut Butter Balls in an airtight container in the refrigerator. They’ll stay fresh for up to 7 days, though they rarely last that long.
For best texture, let them sit at room temperature for a few minutes before serving.
12. Make-Ahead and Freezing Options
Yes, you can make these ahead of time. Freeze the finished balls in a sealed container for up to 2 months. Thaw overnight in the refrigerator before serving.
They’re perfect for planning ahead during busy seasons.
13. Common Mistakes to Avoid
Even simple recipes have pitfalls:
Skipping chilling time
Overheating chocolate
Using natural peanut butter that’s too oily
Avoid these, and you’re golden.
14. Why Kids and Adults Love This Recipe
Kids love the sweetness and fun shape. Adults love the nostalgia and ease. It’s a rare dessert that bridges generations—kind of like a favorite song everyone knows the words to.
15. Final Thoughts on This Classic Treat
Rice Krispie Peanut Butter Balls prove that great desserts don’t have to be complicated. With a handful of ingredients and a little chill time, you get a treat that’s crunchy, creamy, and downright addictive.
If you’re looking for a reliable, crowd-pleasing recipe that feels homemade and heartfelt, this one deserves a permanent spot in your recipe collection.
Frequently Asked Questions
1. Can I make Rice Krispie Peanut Butter Balls without chilling them?
Chilling helps the balls firm up and makes dipping easier, so it’s highly recommended.
2. Are Rice Krispie Peanut Butter Balls gluten-free?
They can be, as long as you use certified gluten-free Rice Krispies.
3. Can I use milk chocolate instead of semi-sweet chocolate?
Yes, but the result will be sweeter. Semi-sweet offers better balance.
4. How long do Rice Krispie Peanut Butter Balls last?
They last up to 7 days in the refrigerator when stored properly.
5. Can I make Rice Krispie Peanut Butter Balls for holidays?
Absolutely. Add festive sprinkles or toppings to match any holiday theme.