Have you ever caught a whiff of fresh bread baking and thought, “I wish I could make that at home”? Good news—you absolutely can! Making Quick and Easy Homemade Bread isn’t just for chefs or baking experts. With just a few pantry staples and a bit of patience, anyone can create fluffy, golden loaves that taste better than anything from the store.
Think of it like planting a seed—you add the right ingredients, give it time to rise, and before you know it, you’re slicing into warm, soft bread made with your own two hands. Let’s dive into this foolproof recipe that’ll turn your kitchen into the coziest bakery on the block.
1. Why Make Bread at Home?
There’s something magical about homemade bread. It’s not just about the taste (though, let’s be honest, nothing beats a warm slice with melted butter). It’s also about the satisfaction of making something from scratch, the money you save, and the control you have over the ingredients.
And hey, in a world of ultra-processed foods, baking your own bread is a small rebellion—and a delicious one at that.
2. Ingredients Overview
Let’s take a closer look at what you’ll need for this Quick and Easy Homemade Bread recipe:
2 cups warm water – The warmth activates the yeast. Think bath water, not boiling.
¼ cup sugar – Feeds the yeast and adds a hint of sweetness.
1½ tbsp yeast – Makes the dough rise like magic.
1½ tsp salt – Brings out the flavor.
¼ cup vegetable oil – Adds moisture and richness.
5½ cups all-purpose flour – The backbone of your bread.
That’s it. Six basic ingredients. You probably already have them in your kitchen.
3. The Science Behind Bread Rising
Here’s where the magic happens. Yeast is a living organism that eats sugar and produces carbon dioxide. When trapped in the dough, those bubbles of gas make the bread rise. It’s like giving your dough a chance to breathe and grow before it hits the oven.
Warm water wakes the yeast up. Sugar feeds it. And time lets it do its thing.
4. Step-by-Step Instructions
Let’s walk through the process in simple steps:
Step 1:
Dissolve sugar in warm water. Add yeast and let it sit until foamy—this takes about 5–10 minutes.
Step 2:
Stir in the oil.
Step 3:
In another bowl, mix flour and salt.
Step 4:
Add the dry mix to the wet ingredients, one cup at a time, stirring until a soft dough forms.
Step 5:
Knead for 3–5 minutes. Don’t skip this—it builds structure.
Step 6:
Place in an oiled bowl, turning to coat. Cover and let rise for 1 hour.
Step 7:
Punch it down, divide into two loaves, and place in greased pans.
Step 8:
Let rise again for 30–40 minutes.
Step 9:
Bake at 350°F (175°C) for 30 minutes. Brush tops with butter while warm.
5. Tips for the Perfect Dough
Use fresh yeast. Old yeast may not rise.
Don’t over-knead. You want a soft, elastic dough, not rubbery.
Sticky dough? Add a little flour—just a tablespoon at a time.
Dry dough? Add a splash of water.
Think of kneading as a mini workout with a delicious reward.
6. Understanding Proofing and Rising
Proofing is just letting your dough rest and rise. It’s not optional—it’s essential.
During the first rise (bulk fermentation), the dough doubles in size. The second rise (after shaping) ensures a soft crumb and good shape.
Warm kitchen = faster rise.
Cold kitchen = be patient.
You can even place your bowl in a turned-off oven with the light on to speed things up.
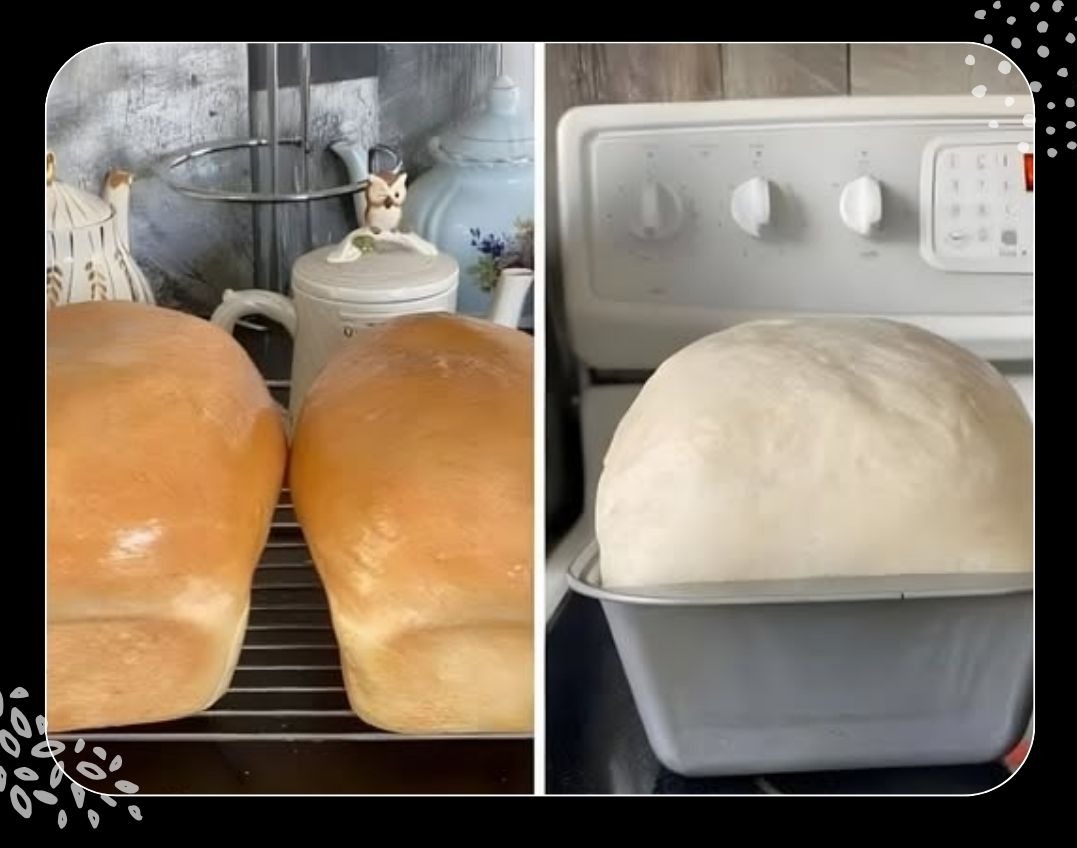
7. Shaping and Baking Your Loaves
Divide the dough evenly. Shape it into logs and gently tuck the ends under. Place them into greased loaf pans and cover loosely.
After the second rise, they’ll look puffy and ready. Pop them in the oven and let that golden transformation begin!
Your kitchen will smell heavenly.
8. Finishing Touches: Butter Brushing
Right after baking, brush the tops of your loaves with butter. It softens the crust and adds that classic bakery shine.
Bonus: It makes your bread Instagram-worthy.
9. Storing Your Homemade Bread
Keep your loaves in a sealed bag or bread box to stay fresh for 3–4 days. Want it to last longer?
Freeze it!
Slice first, wrap in foil, and freeze in a zip-top bag. Just toast a slice when needed—like having fresh bread on demand.
10. Common Mistakes and Fixes
Flat bread? Your yeast might be dead.
Dough didn’t rise? Check water temperature—it might’ve been too hot.
Bread too dense? Could be too much flour or under-kneading.
Crust too hard? Try covering the loaf with a clean towel while it cools.
Even if it’s not perfect, it’ll still taste great.
11. Creative Variations You Can Try
Once you master the basic Quick and Easy Homemade Bread, try mixing things up:
Add garlic powder and herbs for savory flavor.
Mix in raisins and cinnamon for a sweet twist.
Swap out vegetable oil for olive oil for a richer taste.
Sprinkle seeds or oats on top before baking.
This base recipe is your blank canvas.
12. Why This Recipe Works Every Time
Simple ratios. Clear steps. No fancy tools.
This recipe works because it’s been refined for real kitchens with real ingredients. Whether you’re a first-timer or a seasoned baker, it delivers soft, fluffy, flavorful bread every single time.
13. Bread Pairing Ideas
Homemade bread is versatile:
Toast it with butter and jam.
Serve it with soups and stews.
Use it for sandwiches or grilled cheese.
Dip it in olive oil and balsamic vinegar.
It’s comfort food that fits any meal.
14. Healthier Alternatives
Want to tweak the recipe?
Use whole wheat flour for added fiber (start with 50/50 mix).
Reduce sugar or use honey instead.
Try coconut oil instead of vegetable oil.
Bread can be both delicious and nutritious.
15. Final Thoughts
Baking Quick and Easy Homemade Bread is more than just a kitchen activity—it’s a rewarding experience. From mixing the ingredients to slicing the warm loaf, it’s a journey worth taking.
You don’t need a bread machine. You don’t need a mixer. All you need is this recipe, your hands, and a little love for good food.
Frequently Asked Questions (FAQs)
1. Can I use whole wheat flour instead of all-purpose flour?
Yes! Start by replacing half the flour with whole wheat to maintain a soft texture. Full substitution may make the bread denser.
2. How do I know if my yeast is still active?
If it foams when mixed with warm water and sugar within 10 minutes, it’s active. No foam? Time for fresh yeast.
3. Can I make this bread without sugar?
You can, but it may not rise as well since sugar feeds the yeast. Consider reducing rather than removing it.
4. Can I bake this bread without a loaf pan?
Absolutely. Shape it into a round boule and bake on a parchment-lined baking sheet.
5. What’s the best way to reheat homemade bread?
Wrap it in foil and warm in the oven at 300°F for 10–15 minutes. For slices, use a toaster or toaster oven.
Ready to turn your kitchen into a mini bakery? Grab that mixing bowl and start your journey to fresh, fluffy, delicious bread. With this Quick and Easy Homemade Bread recipe, you’ve got everything you need.
Happy baking!