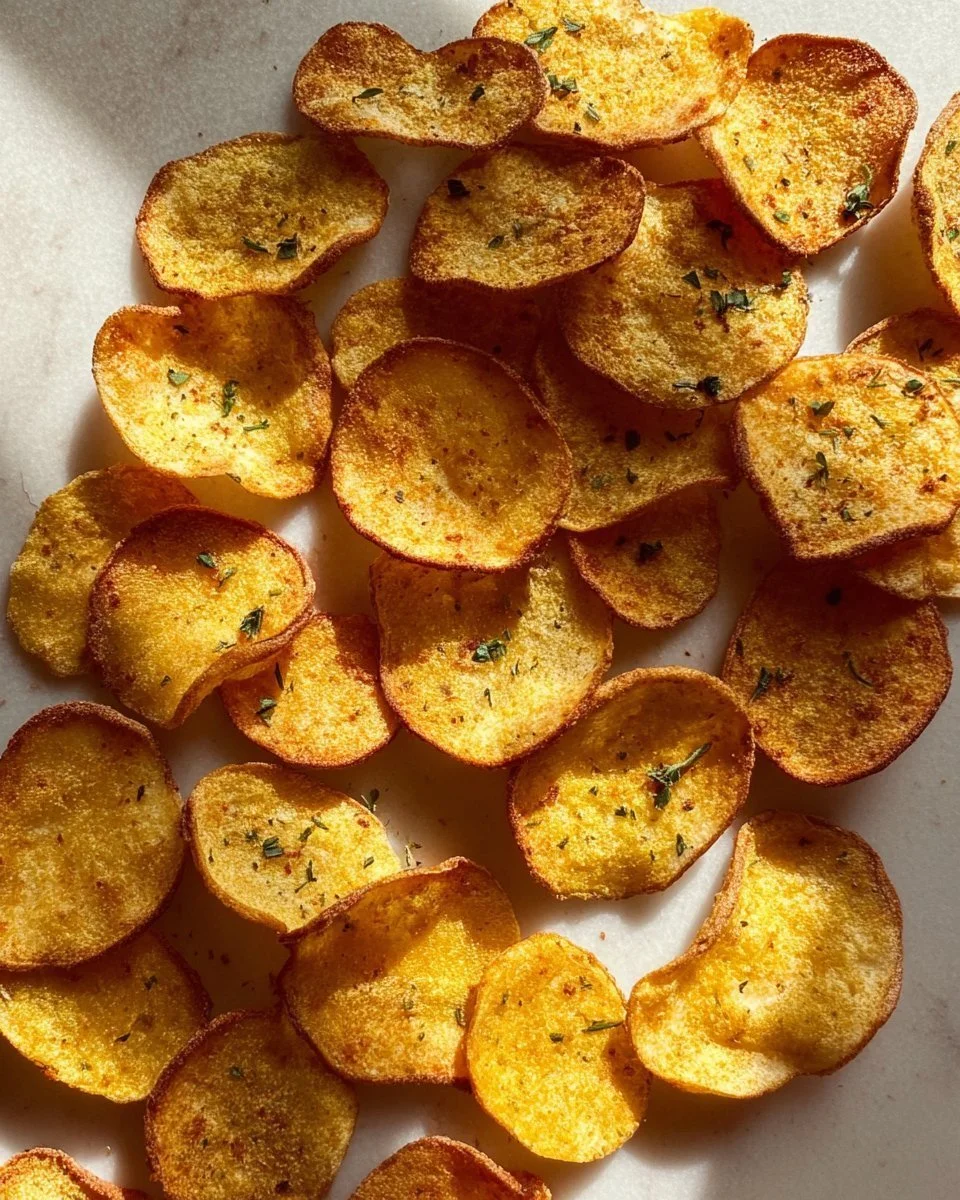
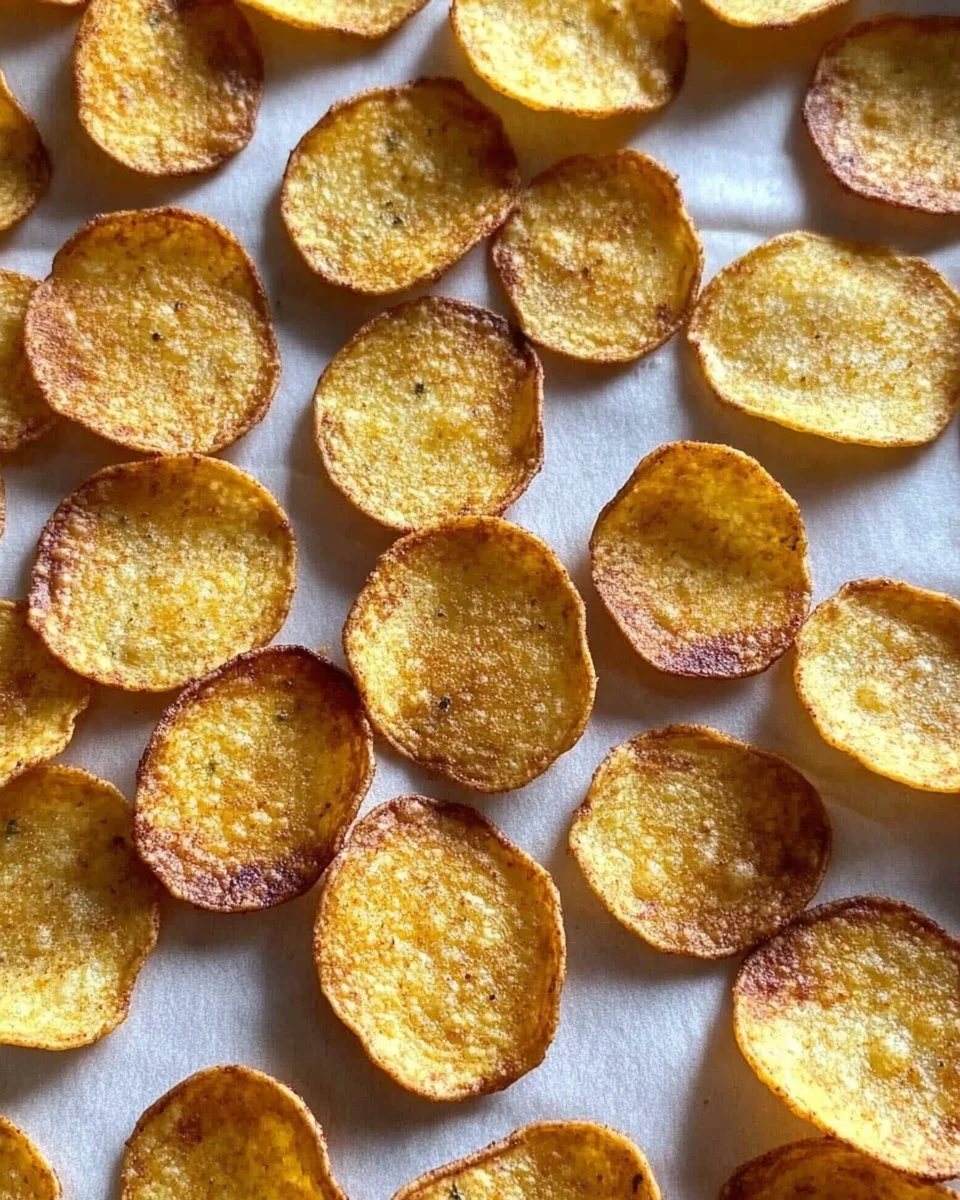
Are you looking for a healthy and delicious snack that’s easy to make? Look no further than baked chickpea chips! These crispy, flavorful delights are not only guilt-free but also packed with protein and fiber. Perfect for dipping or enjoying on their own, this recipe is sure to become a favorite in your household. With just a handful of ingredients and a quick baking process, you can whip up a batch of these tasty chips in no time. Let’s dive into why you should give them a try!
What Makes This Recipe So Good
Baked chickpea chips stand out for several reasons. First, they are incredibly easy to prepare, making them a perfect recipe for both novice cooks and seasoned chefs. Inside 30 minutes, you can have a fresh, crunchy snack waiting for you. Second, they are budget-friendly! With only a few affordable ingredients required, making them at home is much cheaper than buying packaged snacks. Lastly, they are wonderfully versatile—you can customize the flavor profile with your favorite herbs and spices, tailoring them to your taste preferences!
Understanding How It All Comes Together
Creating baked chickpea chips is a straightforward process that involves mixing the ingredients, spreading them on baking sheets, and letting the oven do the magic. Start off by preparing your oven and mixing the chickpea flour with water and salt into a smooth batter. Once you spread the mixture into thin circles on parchment paper, you’re well on your way to a healthier snack. After baking them to golden perfection, you’ll let them cool before diving in!
Ingredients
Prep Time: 10 minutes
Cook Time: 10 minutes
Total Time: 20 minutes
Servings: 4
- 80 grams chickpea flour
- 140 grams water
- 1/2 teaspoon salt
- Chopped fresh herbs or dried herbs, or spices
Chickpea flour is the star of this recipe. Made from ground chickpeas, it’s rich in fiber and protein, making it a healthier alternative to traditional snacks. The water and salt will help to create the perfect batter, while the herbs or spices are optional additions that allow you to explore a wider array of flavors.
Step-by-Step Instructions
- Preheat your oven to 200C (400F).
- In a mixing bowl, combine chickpea flour, water, and salt until smooth, ensuring there are no lumps.
- Line two baking sheets with parchment paper for easy cleanup.
- Spoon batter onto parchment, spreading into thin circles. Keep them as uniform as possible for even cooking.
- If desired, sprinkle chopped herbs or spices on top for extra flavor.
- Bake for about 10 minutes until golden brown, keeping an eye on them to avoid burning—this can happen quickly!
- Cool on baking sheets for 15 to 20 minutes, then enjoy plain or with dips of your choice.
Remember to stay near the oven while they bake, as the thin chips can go from golden to burnt in seconds if you’re not careful!
Creative Ways to Serve Your Chips
Baked chickpea chips are delicious on their own, but why stop there? Consider serving them with a variety of dips like hummus, guacamole, or a yogurt-based dip. They also pair beautifully with vegetable platters at parties or as toppings on salads for an added crunch. These chips make a great addition to picnic spreads or movie night snacks. Enjoy them with your favorite drink, be it a refreshing iced tea or a crisp glass of white wine.
Tips for Storing and Reheating
If you end up with leftovers, you can store your chickpea chips in an airtight container at room temperature for 2 to 3 days. To maintain their crispiness, avoid refrigeration unless absolutely necessary. If you do need to refrigerate them, reheat in the oven for a few minutes to regain their crunch. Reheating them in the microwave may make them softer, so stick to the oven for best results.
Expert Advice for Success
Here are some practical tips to ensure your baked chickpea chips turn out perfectly:
- Be diligent about mixing the batter well. A smooth blend without lumps will yield a better texture.
- Keep an eye on the chips while baking. Thin chips can burn easily, and you want them crisp but not charred.
- Experiment with different seasoning blends. Garlic powder, paprika, or nutritional yeast can elevate your chips.
- Don’t overcrowd the baking sheets. Leave enough space between the chips for even cooking.
Common mistakes include spreading the batter too thickly or forgetting to preheat your oven. Both can lead to chewy instead of crispy chips!
Delicious Variations You Might Enjoy
If you want to change things up, consider some variations of the basic recipe:
- Add various spices to the batter, such as cumin, chili powder, or even curry powder for a bold twist.
- Try adding a bit of cheese to the batter for a cheesy flavor and extra richness.
- Incorporate finely chopped roasted vegetables for added flavor and nutrition.
Feel free to get creative! The world of flavor is yours to explore!
Common Questions
Can I use other flours?
Yes, while chickpea flour is recommended for this recipe, you can experiment with quinoa flour or oat flour for different textures.
Can I bake these chips longer for extra crunch?
Absolutely! Just keep a close watch to prevent burning—additional baking time can make them crunchier.
How can I make these chips spicier?
Incorporate red pepper flakes or cayenne pepper into your batter for some extra heat!
Are these chips gluten-free?
Yes, chickpea flour is naturally gluten-free, making these chips a great option for those with gluten sensitivities.
Can I make these chips in advance?
Yes! They store well, and you can make a big batch to enjoy throughout the week.