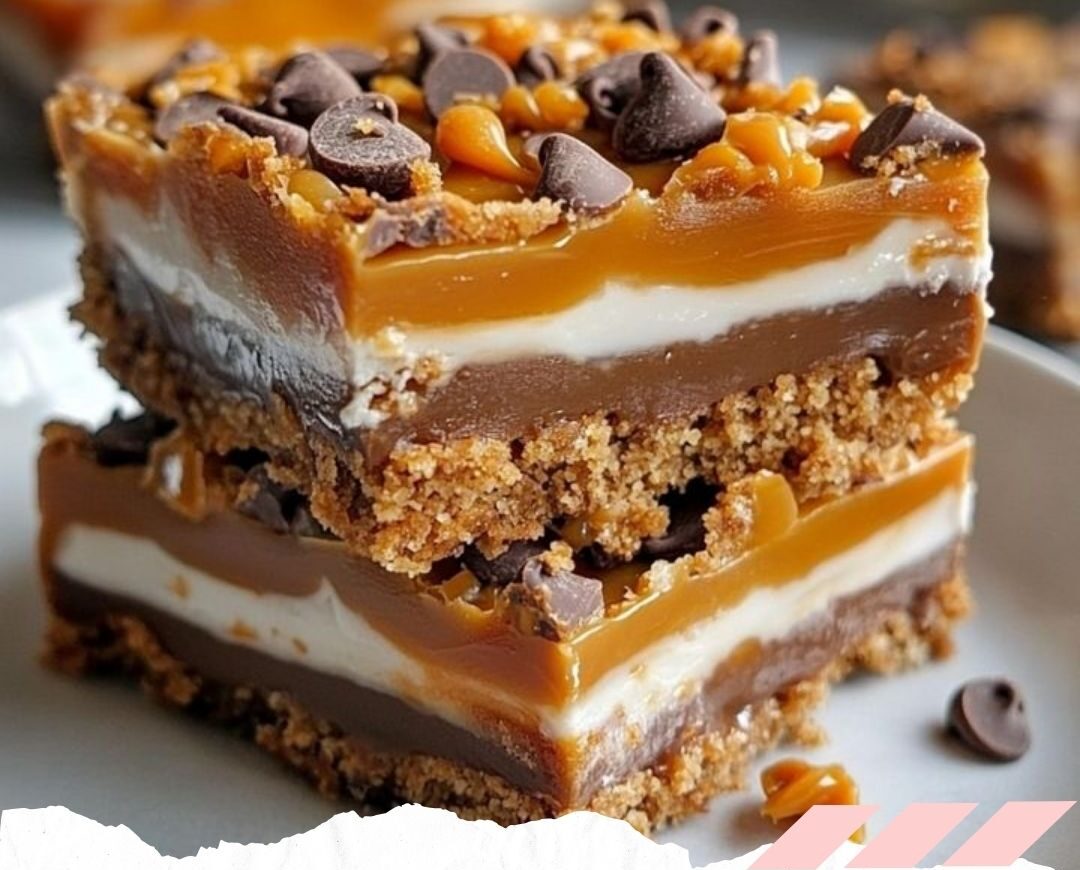
Looking for a sweet treat that combines the crunchy goodness of Butterfinger with gooey caramel and rich chocolate? Butterfinger Caramel Crunch Bars are the ultimate indulgence! This easy, no-fuss recipe will give you buttery layers of graham cracker crust, melted caramel, and peanut butter, topped with a drizzle of chocolate for the perfect dessert bar.
In this guide, we’ll walk through each step to create these delectable bars and provide tips to make your dessert unforgettable.
Introduction
Imagine biting into a dessert where each layer delivers its own unique texture and taste: a buttery crust, a creamy peanut butter base, and a gooey caramel layer, all topped off with melted chocolate and Butterfinger pieces. These Butterfinger Caramel Crunch Bars are not only delicious but also easy to make, and they make the perfect treat for any occasion.
Let’s dive into the recipe and see how you can make this mouth-watering dessert in a few simple steps.
Ingredients Needed
To make Butterfinger Caramel Crunch Bars, gather the following ingredients:
- 1 cup butter, melted
- 2 cups graham cracker crumbs
- 1 cup powdered sugar
- 1 cup creamy peanut butter
- 1 package (10 oz) Butterfinger baking bits
- 1 package (11 oz) caramel bits
- 2 tablespoons heavy cream
- 1 cup chocolate chips
Each ingredient plays a crucial role in bringing out the decadent layers of this dessert.
Step-by-Step Instructions
1. Preheat Your Oven
First, set your oven to 350°F (175°C) and line a 9×13-inch baking dish with parchment paper. This will make it easier to lift the bars out once they’re ready.
2. Preparing the Graham Cracker Crust
In a medium-sized bowl, mix the melted butter, graham cracker crumbs, powdered sugar, and peanut butter until well combined. This mixture will form the buttery crust of your bars, providing a solid foundation for the other layers.
Tip: Use a spatula to press this mixture evenly into the baking dish, ensuring a smooth base.
3. Baking the Crust
Place the prepared crust in the preheated oven and bake for 10 minutes. This short bake helps set the crust and enhances its flavor. Once done, take it out and let it cool slightly.
4. Adding the Peanut Butter Layer
With the crust cooled slightly, it’s time to add the creamy peanut butter layer. Peanut butter adds a smooth, nutty richness to the bars, complementing the crunchy Butterfinger bits.
5. Sprinkling the Butterfinger Bits
Once the peanut butter layer is evenly spread, sprinkle the Butterfinger baking bits over it. The Butterfinger bits add a delightful crunch and signature flavor to the dessert.
6. Melting the Caramel
In a microwave-safe bowl, combine the caramel bits with 2 tablespoons of heavy cream. Microwave in 30-second intervals, stirring between each interval until the caramel is melted and smooth. The cream helps create a silky, pourable caramel.
7. Pouring the Caramel Sauce
Pour the melted caramel over the Butterfinger layer, allowing it to spread evenly. The caramel brings a gooey texture and a rich sweetness that balances the other flavors.
8. Melting the Chocolate Chips
In another microwave-safe bowl, melt the chocolate chips in 30-second intervals, stirring between each interval until smooth. Drizzle the melted chocolate over the caramel layer, adding a beautiful finish to the bars.
Tip: You can use a fork or a spoon to create swirls or patterns with the chocolate for a decorative effect.
9. Setting and Chilling the Bars
Refrigerate the bars for at least 2 hours or until they’re fully set. This step ensures that each layer firms up, making the bars easier to cut and serve.
10. Serving and Storing Tips
Once the bars are set, cut them into squares and serve. These bars are best enjoyed chilled or at room temperature. If you have leftovers, store them in an airtight container in the refrigerator for up to a week.
Why These Bars Are So Popular
Butterfinger Caramel Crunch Bars bring together classic flavors with minimal effort. Whether for a family gathering, holiday, or as a gift, these bars are a crowd-pleaser thanks to their unique blend of textures and tastes.
Common Questions & Tips
- Can I use other types of candy bits? Yes, feel free to experiment with different candy bits or nuts to make these bars your own.
- How can I make them gluten-free? Substitute gluten-free graham cracker crumbs for the regular ones, and ensure all other ingredients are gluten-free.
- Can I freeze these bars? Absolutely! Wrap them individually in plastic wrap and place them in an airtight container for up to three months.
Conclusion
Butterfinger Caramel Crunch Bars are a fun, flavorful treat that’s simple enough for beginners and satisfying for anyone with a sweet tooth. From the buttery crust to the rich caramel and chocolate drizzle, each bite offers a little bit of everything.
FAQs
1. Can I substitute crunchy peanut butter for creamy peanut butter?
Yes, using crunchy peanut butter will add extra texture to the bars, making them even more satisfying.
2. How can I prevent the caramel from hardening too quickly?
Adding heavy cream to the caramel bits helps keep the caramel soft and pliable, making it easier to pour and spread.
3. Can I use a different type of chocolate for the drizzle?
Absolutely! Dark, milk, or white chocolate can all work well with these bars, depending on your preference.
4. How long do the bars last?
Stored in an airtight container in the refrigerator, they will stay fresh for up to one week.
5. Are Butterfinger Caramel Crunch Bars suitable for kids?
Yes, kids love the sweet, crunchy layers, but be mindful of the caramel and chocolate if they’re sensitive to sugar.


