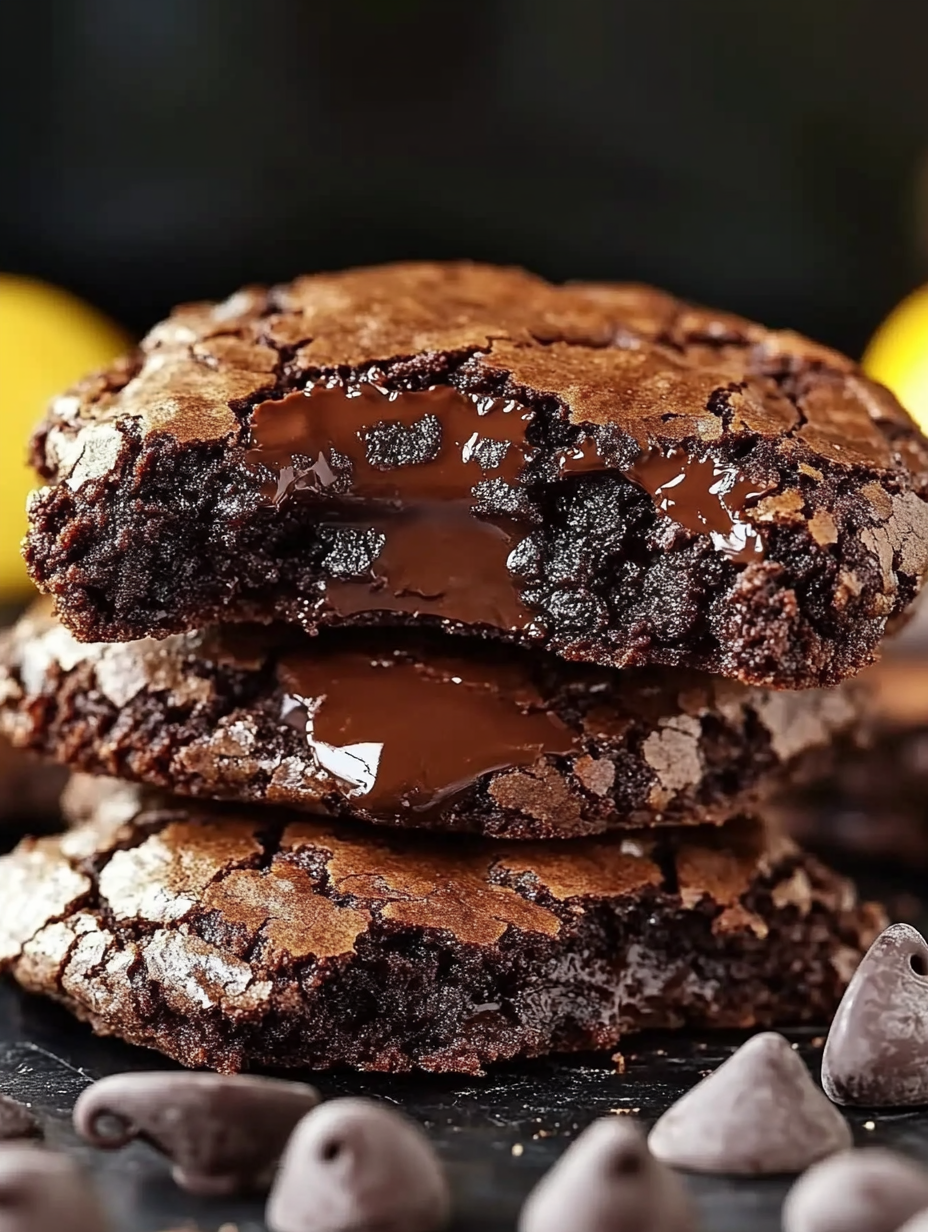
There’s something magical about breaking open a warm cookie and watching melted chocolate slowly spill out. It feels almost dramatic—like dessert putting on a show just for you. That’s exactly what you get with Chocolate Lava Brownie Cookies. They combine the chewy richness of a brownie with the soft, gooey center of a lava cake.
If you’ve ever stood in your kitchen craving something deeply chocolatey but comforting at the same time, this recipe is about to become your new favorite. And the best part? You don’t need fancy tools or complicated steps. Just simple ingredients and a little love.
Table of Contents
| Sr# | Headings |
|---|---|
| 1 | Why You’ll Love Chocolate Lava Brownie Cookies |
| 2 | What Makes Them Different from Regular Cookies? |
| 3 | Key Ingredients Explained |
| 4 | Preparation Time, Cook Time & Servings |
| 5 | Step-by-Step Baking Instructions |
| 6 | Tips for the Perfect Lava Center |
| 7 | Common Mistakes to Avoid |
| 8 | Texture and Flavor Profile |
| 9 | Serving Suggestions |
| 10 | Storage and Reheating Tips |
| 11 | How to Customize Your Cookies |
| 12 | Baking Tools You’ll Need |
| 13 | Why Chilling the Dough Matters |
| 14 | Making Them for Special Occasions |
| 15 | Final Thoughts |
1. Why You’ll Love Chocolate Lava Brownie Cookies
If you love brownies and cookies equally, why choose? These Chocolate Lava Brownie Cookies give you both in one bite.
They’re:
Rich and fudgy
Crackly on top
Soft and gooey inside
Deeply chocolatey
It’s like biting into a warm hug made of chocolate. And honestly, who wouldn’t want that?
2. What Makes Them Different from Regular Cookies?
Regular chocolate cookies are delicious, sure. But these? They’re on another level.
The secret is the molten chocolate center. When you insert extra chocolate chips into the middle of each dough ball, you create a hidden pocket of melty goodness.
Think of it like a treasure chest—except instead of gold, you get warm, flowing chocolate.
3. Key Ingredients Explained
Let’s break down the ingredients so you know exactly what makes these cookies shine.
Unsalted Butter
Butter adds richness and moisture. Using unsalted butter lets you control the salt level.
Semi-Sweet Chocolate Chips
These melt into the batter and create that deep chocolate flavor.
Granulated Sugar & Brown Sugar
The combination creates:
Sweetness
Moisture
Chewy texture
Brown sugar especially helps with softness.
Eggs
Eggs bind everything together and add structure.
Vanilla Extract
Vanilla enhances the chocolate flavor without overpowering it.
Flour & Cocoa Powder
Flour gives structure, while cocoa intensifies the chocolate taste.
Baking Powder
This gives a slight lift, keeping the cookies from becoming too dense.
Salt
Salt balances the sweetness and enhances flavor.
Extra Chocolate Chips
These create the lava center. Don’t skip them!
4. Preparation Time, Cook Time & Servings
Preparation Time: 20 minutes
Chill Time: 15 minutes
Cook Time: 10–12 minutes
Total Time: Approximately 45 minutes
Servings: About 18 cookies
Perfect for sharing—or not. No judgment here.
5. Step-by-Step Baking Instructions
Follow these directions exactly for the best results.
Ingredients
1/2 cup unsalted butter
12 ounces semi-sweet chocolate chips
1/2 cup granulated sugar
1/2 cup packed brown sugar
2 large eggs
1 teaspoon vanilla extract
1 cup all-purpose flour
1/4 cup cocoa powder
1 teaspoon baking powder
1/2 teaspoon salt
Additional chocolate chips for filling
Directions
Preheat oven to 350°F (177°C).
Melt butter and chocolate chips together; let cool slightly.
Whisk together sugars, eggs, and vanilla. Stir into the chocolate mixture.
Sift in flour, cocoa powder, baking powder, and salt; fold to combine.
Chill dough for 15 minutes for easier handling.
Form dough into balls, insert a few extra chocolate chips in the center of each, and place on baking sheet.
Bake for 10-12 minutes until the tops are glossy and cracked.
Let cool on baking sheet for 5 minutes; transfer to wire rack to cool completely.
Enjoy!
6. Tips for the Perfect Lava Center
Want that dramatic molten moment? Keep these tips in mind:
Don’t overbake. The center should still be soft.
Use enough filling. A few extra chocolate chips make a difference.
Bake at the correct temperature. Too hot, and they dry out.
Remember, cookies continue cooking on the baking sheet after you remove them.
7. Common Mistakes to Avoid
Even simple recipes can go wrong. Watch out for these:
Overmixing the batter
Skipping the chill time
Overbaking
Using low-quality chocolate
High-quality chocolate makes a noticeable difference in flavor.
8. Texture and Flavor Profile
These cookies are:
Crispy on the edges
Crackly on top
Soft in the center
Molten in the middle
The flavor? Bold, rich, and slightly bittersweet. Not overly sugary—just balanced perfection.
9. Serving Suggestions
Want to take your Chocolate Lava Brownie Cookies to the next level?
Try:
Serving warm with vanilla ice cream
Dusting with powdered sugar
Pairing with espresso or milk
Drizzling with chocolate sauce
Warm cookies and cold ice cream? That contrast is unbeatable.
10. Storage and Reheating Tips
Store cookies in an airtight container at room temperature for up to 4 days.
To reheat:
Microwave for 10–15 seconds
That brings the lava center back to life.
You can also freeze the dough balls and bake fresh whenever you want.
11. How to Customize Your Cookies
Feeling creative?
Add:
White chocolate chips
Chopped nuts
A sprinkle of sea salt
A dash of espresso powder
But honestly? They’re incredible just as they are.
12. Baking Tools You’ll Need
Keep it simple:
Mixing bowls
Whisk
Spatula
Baking sheet
Parchment paper
Wire rack
No stand mixer required.
13. Why Chilling the Dough Matters
Chilling helps:
Firm up the dough
Prevent spreading
Deepen flavor
It’s a small step with big rewards.
14. Making Them for Special Occasions
These cookies are perfect for:
Birthdays
Holiday cookie trays
Valentine’s Day
Dinner parties
Bake sales
They look impressive but are surprisingly easy to make. Your guests will think you spent hours in the kitchen.
15. Final Thoughts
If you’re looking for a dessert that feels indulgent but is simple to prepare, Chocolate Lava Brownie Cookies are the answer. They’re rich without being heavy, sweet without being overwhelming, and dramatic without being difficult.
Sometimes, the best recipes are the ones that surprise you with how easy they are. And when that warm chocolate center flows out with the first bite? Totally worth it.
FAQs
1. Can I make Chocolate Lava Brownie Cookies ahead of time?
Yes! You can prepare the dough and refrigerate it for up to 24 hours before baking.
2. Why didn’t my cookies have a lava center?
They were likely overbaked or didn’t have enough chocolate chips in the center.
3. Can I freeze Chocolate Lava Brownie Cookies?
Absolutely. Freeze baked cookies or unbaked dough balls for up to 3 months.
4. Can I use milk chocolate instead of semi-sweet?
You can, but the cookies will be sweeter and less rich in flavor.
5. How do I keep the cookies soft?
Store them in an airtight container and avoid overbaking.
Now it’s your turn. Are you ready to bake a batch of warm, gooey Chocolate Lava Brownie Cookies? 🍫