Introduction
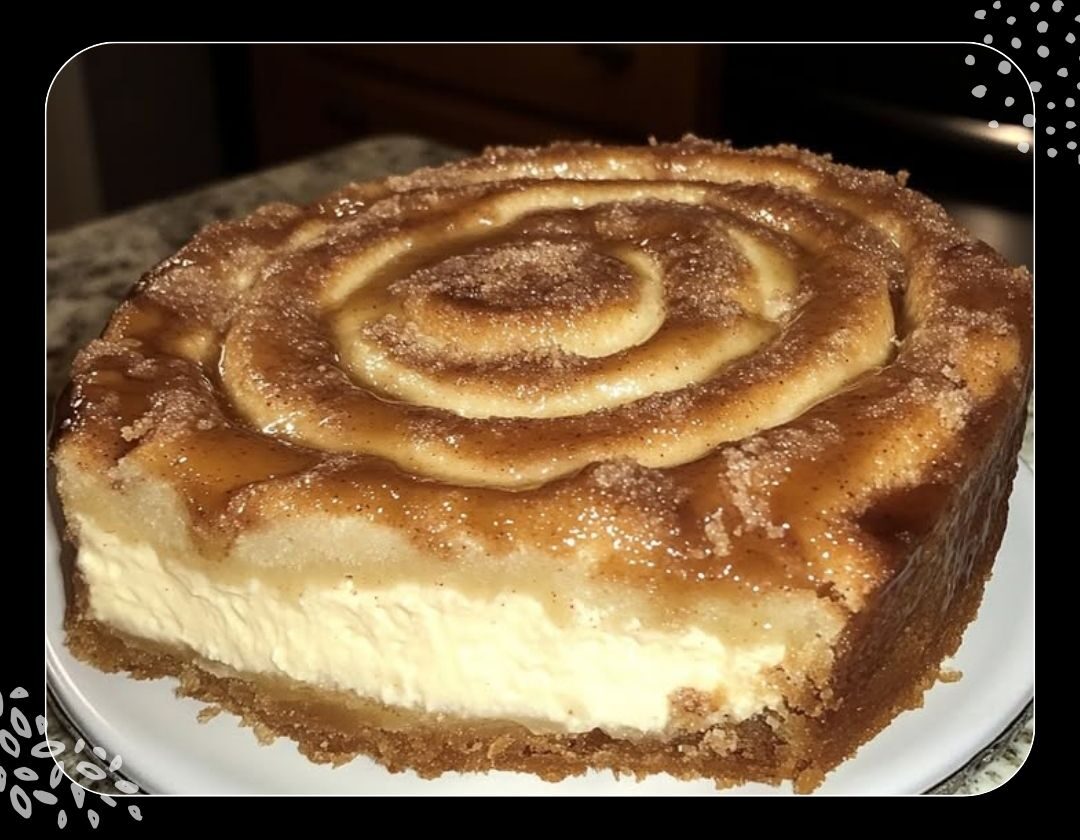
What happens when you take the warm, gooey goodness of cinnamon rolls, pair it with the creamy luxury of cheesecake, and crown it with a sweet honeybun glaze? You get a masterpiece: Cinnamon Roll Honeybun Cheesecake. This dessert is not just food—it’s a story on a plate, combining classic comfort flavors into something unforgettable.
Imagine biting into a soft cinnamon roll crust, sinking your fork through a silky cheesecake filling, and finishing with a drizzle of golden honey topping. Doesn’t that sound like pure happiness? If you’ve ever wanted a dessert that feels like a cozy hug, this recipe is it.
In this article, we’ll walk through the exact ingredients and steps to bring this creation to life. But we’ll also go deeper—exploring why this recipe works, tips for perfect results, and variations to keep things exciting. Ready to turn your kitchen into a bakery? Let’s dive in.
1. Why Cinnamon Roll Honeybun Cheesecake is a Must-Try
Cheesecake by itself is already a showstopper, but when you give it a cinnamon roll crust and honeybun glaze, you’re elevating it to legendary status. It’s like combining two crowd favorites into one epic dessert—comforting cinnamon rolls and indulgent cheesecake. Perfect for birthdays, holidays, or just because you deserve it.
2. Ingredients You’ll Need
Here’s everything you need, divided into sections for clarity:
For the cinnamon roll crust:
1 can of cinnamon roll dough (8-count)
2 tablespoons butter, melted
1/4 cup brown sugar
1 teaspoon cinnamon
For the cheesecake filling:
16 oz cream cheese, softened
1/2 cup sugar
1 teaspoon vanilla extract
2 large eggs
1/2 cup sour cream
For the honeybun topping:
1/4 cup honey
2 tablespoons butter, melted
1 tablespoon milk
1/4 teaspoon cinnamon
3. Tools and Equipment for Success
Before you start, gather these essentials:
9-inch springform pan
Mixing bowls
Electric mixer or stand mixer
Whisk and spatula
Measuring cups and spoons
Aluminum foil (to prevent over-browning)
Having the right tools makes this process smoother and ensures your cheesecake comes out looking bakery-quality.
4. Preparing the Cinnamon Roll Crust
This crust is what makes the cheesecake extra special.
Preheat oven to 325°F (163°C) and grease your springform pan.
Roll out the cinnamon roll dough and flatten slightly. Arrange them to cover the bottom of the pan.
Mix melted butter, brown sugar, and cinnamon. Pour evenly over the dough.
Bake for 15–20 minutes until golden brown and slightly puffed.
Tip: Don’t overbake. The crust should be golden but not hard, as it will bake again later with the cheesecake.
5. Crafting the Creamy Cheesecake Filling
This is where the magic happens.
Beat cream cheese, sugar, and vanilla until smooth.
Add eggs one at a time, mixing after each.
Stir in sour cream until silky.
Pour over cooled cinnamon roll crust.
Think of this filling as the heart of the dessert—it needs patience and love to become perfectly smooth.
6. Baking to Perfection
Bake at 325°F (163°C) for 50–60 minutes. The center should be set but still slightly jiggly.
If it’s browning too quickly, cover with foil. Once baked, turn off the oven and let it cool inside with the door slightly open for an hour. This helps prevent cracks.
7. The Secret to a Smooth Cheesecake
Here’s the truth: cheesecakes crack when they cool too fast. By letting it rest in the oven with the door open, you allow it to settle gently, like letting bread dough rest before baking. Think of it as the cheesecake “exhaling” after all that heat.
8. Making the Honeybun Topping
In a small bowl, mix honey, melted butter, milk, and cinnamon until smooth. Once the cheesecake is cooled, pour evenly on top and spread gently.
This topping is the crown jewel—it adds sweetness, shine, and that signature honeybun flavor.
9. Chilling and Setting the Cheesecake
Patience pays off here. Refrigerate for at least 4 hours, preferably overnight. The longer it chills, the more the flavors settle and the texture firms up beautifully.
10. Serving Suggestions
Garnish with a drizzle of extra honey or caramel.
Add whipped cream for extra indulgence.
Pair with hot coffee, chai, or spiced latte for a cozy experience.
11. Storage and Make-Ahead Tips
Store in the fridge, covered, for up to 5 days.
Freeze slices wrapped in plastic wrap and foil for up to 2 months. Thaw overnight before serving.
This makes it perfect for preparing ahead of holidays or dinner parties.
12. Variations to Try
Apple Cinnamon Roll Cheesecake – add sautéed apples between the crust and filling.
Pumpkin Cinnamon Roll Cheesecake – mix pumpkin puree into the filling for a fall twist.
Nutty Honeybun Topping – sprinkle chopped pecans or walnuts before chilling.
13. Common Mistakes to Avoid
Overmixing the batter → can create cracks.
Skipping the chill time → leads to a runny texture.
Using cold cream cheese → makes a lumpy filling.
14. Why This Recipe Works
It’s all about balance. The cinnamon roll crust gives warmth and spice, the cheesecake filling delivers creamy richness, and the honeybun topping ties it together with sweetness. Each layer supports the other—like a well-rehearsed orchestra playing in harmony.
15. Final Thoughts
This Cinnamon Roll Honeybun Cheesecake is more than dessert—it’s comfort, nostalgia, and celebration all in one. Whether you’re baking it for a holiday table or just to treat yourself, this recipe guarantees smiles.
So next time you’re craving something that feels indulgent yet homey, remember this cheesecake. It’s the kind of dessert that makes memories.
FAQs
1. Can I use homemade cinnamon roll dough instead of canned?
Yes! Homemade dough works beautifully and adds a rustic touch, but it will take more prep time.
2. How do I know when the cheesecake is fully baked?
The edges should be firm, and the center should have a slight jiggle when gently shaken.
3. Can I make this cheesecake without sour cream?
Yes, you can replace sour cream with plain Greek yogurt for a tangy alternative.
4. Why does my cheesecake crack on top?
Usually from cooling too quickly or overbaking. Letting it rest in the oven helps prevent this.
5. Can I make mini versions of this recipe?
Absolutely! Use a muffin tin with cupcake liners for individual servings—just reduce the bake time.