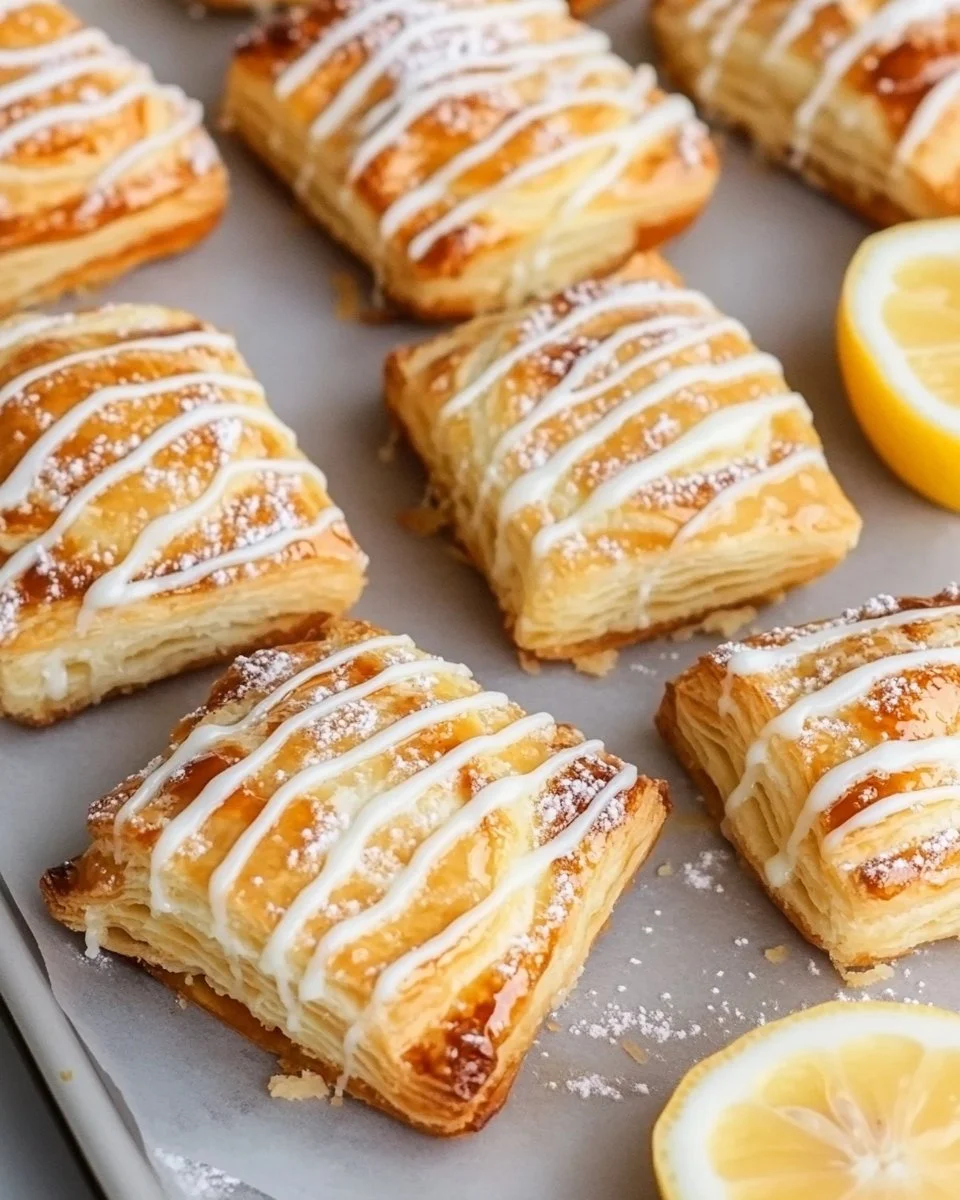
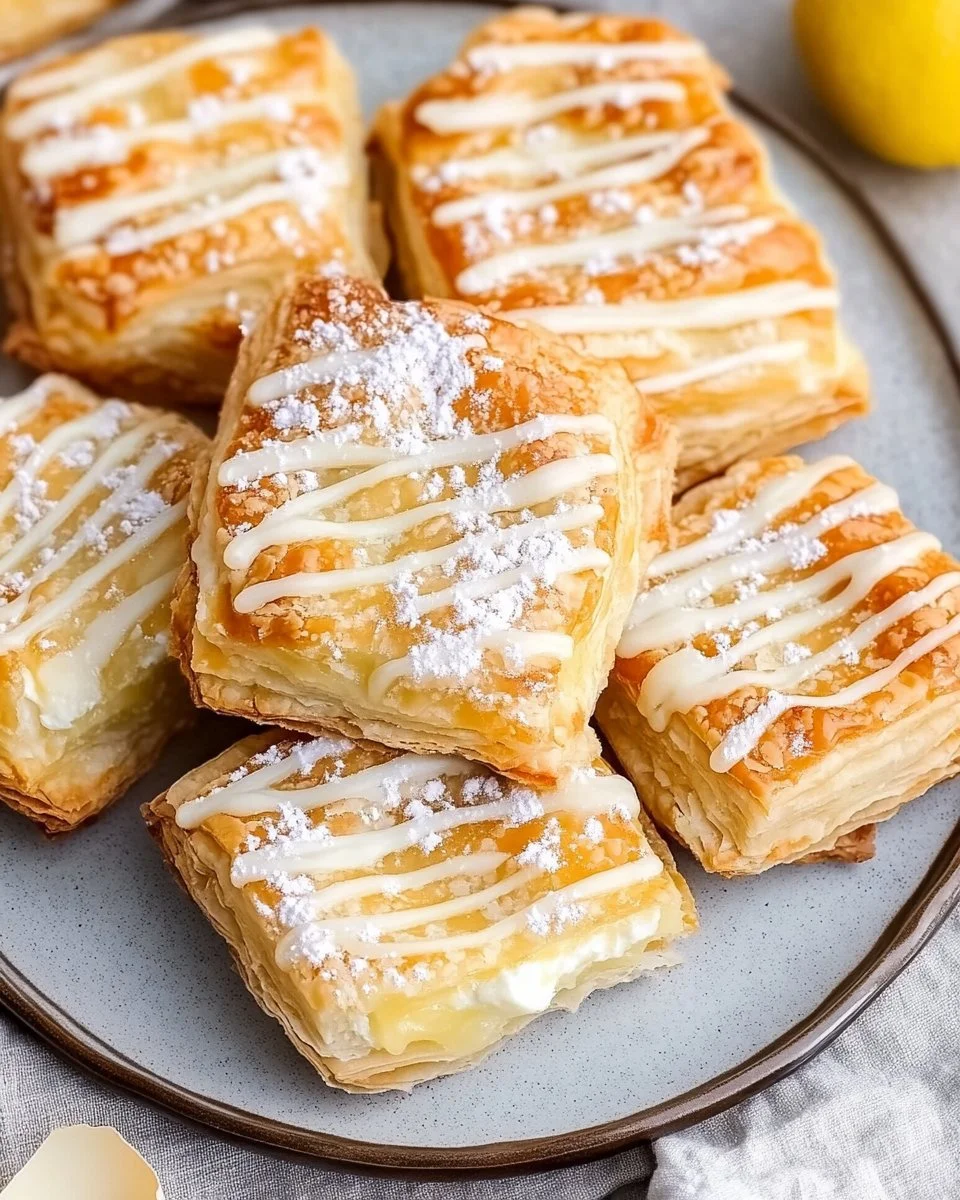
When it comes to delightful pastries that warm the heart and please the palate, Cream Cheese Danish takes the cake—or rather, the pastry! This lovely treat combines a flaky, buttery exterior with a luscious cream cheese filling that is simply irresistible. Whether you’re enjoying them for breakfast with a cup of coffee or serving them at a brunch gathering, these danishes are sure to impress. The crispy layers of puff pastry, combined with the sweet and tangy filling, make for a perfect bite every time. If you’re looking for a comforting dessert or snack to brighten up your day, look no further!
Why This Recipe Works Best
This cream cheese danish recipe stands out for several reasons. First and foremost, it’s incredibly easy to make, even for those who may feel intimidated by baking. Utilizing store-bought puff pastry shortcuts the time and effort usually required for making the dough from scratch. Moreover, this recipe is budget-friendly, requiring just a handful of ingredients that you may already have in your kitchen. The end result is a batch of beautifully golden danishes that are perfect for any occasion without breaking the bank. You’ll also love that it can be whipped up in a little over half an hour!
How This Recipe Comes Together
Creating these delectable danishes is straightforward and beginner-friendly. You start by rolling out the puff pastry and cutting it into squares. Then, you whip up a simple cream cheese filling by mixing the ingredients in a bowl. After that, spoon the filling onto the pastry squares, fold them up, and brush them with an egg wash for a nice golden finish. A quick bake in the oven transforms your creations into delightful pastries. Finally, drizzling a lemon glaze adds the perfect touch of sweetness and tang. It’s a process that might seem intimidating at first, but each step is manageable, and the results are absolutely worth it!
Ingredients
Here’s what you need to make these delightful Cream Cheese Danishes:
- 1 pound puff pastry
- 8 ounces cream cheese
- 1/4 cup granulated sugar
- 1 egg yolk (room temperature)
- 1/2 teaspoon vanilla extract
- 1/2 teaspoon almond extract
- 1 teaspoon lemon juice
- 1 egg
- 1 Tablespoon water
- 1/2 cup powdered sugar
- 1 Tablespoon fresh lemon juice
Key Ingredients Explained:
- Puff Pastry: The star of this recipe, puff pastry, creates those beautifully flaky layers. You can find it in the frozen section of most grocery stores.
- Cream Cheese: This provides a creamy and rich filling. Make sure it’s softened to blend easily with the other ingredients.
- Extracts: The combination of vanilla and almond extracts adds a lovely depth of flavor, while lemon juice brightens the filling.
Step-by-Step Instructions
Follow these detailed steps to create your Cream Cheese Danishes:
- Preheat Your Oven: Start by preheating your oven to 400°F (200°C). A hot oven is crucial for achieving that perfect flaky texture in puff pastry.
- Prepare the Puff Pastry: Roll out the puff pastry on a floured surface to ensure it doesn’t stick. Cut it into squares, typically about 3 to 4 inches on each side.
- Mix the Filling: In a mixing bowl, combine the cream cheese, granulated sugar, egg yolk, vanilla extract, almond extract, and lemon juice. Stir until the mixture is smooth and creamy. This filling is what makes your danish so special.
- Fill the Pastry: Place a spoonful of the cream cheese mixture in the center of each puff pastry square. Be cautious not to overfill; otherwise, the filling might ooze out during baking.
- Seal the Pastry: Fold the corners of the pastry over the filling, pinching the edges together to seal. Ensure there are no gaps so the filling stays put while baking.
- Prepare for Baking: In a small bowl, beat one egg with a tablespoon of water for an egg wash. Brush this mixture over the tops of the folded pastries to achieve a beautiful golden color.
- Bake: Place the pastries on a baking sheet lined with parchment paper and bake in your preheated oven for about 15-20 minutes, or until they are golden brown. Keep an eye on them; ovens can vary!
- Make the Glaze: Once the danishes are baked and slightly cooled, mix the powdered sugar with fresh lemon juice to create a smooth glaze. Drizzle this over the pastries for a sweet and zesty finish.
- Enjoy: Serve your Cream Cheese Danishes warm or at room temperature. They are best enjoyed fresh but will still taste great later!
Serving Suggestions
These danishes are incredibly versatile and can be served in various ways. Here are a few ideas:
- Breakfast Delight: Pair them with your morning coffee or tea for a sweet start to your day.
- Brunch Treat: Serve at brunch gatherings alongside fruit salads, flaky croissants, and refreshing beverages.
- Snack Option: Enjoy them as a delightful afternoon snack, especially with a light beverage like herbal tea.
- Special Occasions: Perfect for holidays or celebrations, these danishes can be presented on a beautiful platter for guests to indulge.
How to Store and Reheat
Storing your Cream Cheese Danishes properly will help maintain their delicious flavor and texture:
- Refrigeration: If you have leftovers, place them in an airtight container and store them in the fridge. They’ll last for about 3-4 days.
- Freezing: For longer storage, you can freeze the unfrosted danishes in a single layer. Once frozen, transfer them to a freezer bag for up to 2 months. To bake from frozen, add a few extra minutes to your baking time.
- Reheating: To reheat, simply pop them in the oven at 350°F (175°C) for about 10 minutes. This will refresh their texture. You can also microwave them for about 20-30 seconds, but the pastry may not remain as crispy.
Helpful Tips for Success
Here are some pro tips to ensure your danishes come out beautifully:
- Use Cold Puff Pastry: Make sure your puff pastry is cold before you roll it out. This helps in achieving the best flakiness.
- Don’t Overmix: When preparing the cream cheese filling, mix until just combined to keep it creamy. Overmixing can introduce too much air, leading to a puffier filling.
- Watch the Baking Time: Every oven is different, so keep an eye on the danishes as they bake. You want them golden, not burnt.
Delicious Variations You Can Try
Feel free to customize these danishes to your liking with these tasty variations:
- Fruit Fillings: Add fruit such as berries, peach slices, or apple cinnamon to the cream cheese filling for a fruity twist.
- Nuts: Incorporate chopped nuts like walnuts or almonds into the filling for added crunch.
- Chocolate: Mix in mini chocolate chips into the cream cheese filling for a chocolatey delight.
Frequently Asked Questions
- Can I make these danishes dairy-free?
- Yes! Substitute cream cheese with a dairy-free alternative and ensure your puff pastry is also dairy-free.
- Can I prepare the filling ahead of time?
- Absolutely! You can prepare the cream cheese filling a day in advance and store it in the refrigerator until you are ready to use it.
- What can I use instead of puff pastry?
- If you prefer, you can use phyllo dough, but the texture will be slightly different. Ensure to layer it with melted butter for the best results.
- How can I tell when the pastries are done baking?
- Look for a golden brown color on top and a puffed-up appearance. If they are golden all over, they are ready!
- Can I add more sugar to the filling?
- Yes, feel free to adjust the sugar amount based on your sweetness preference. Just be cautious not to over-sweeten.