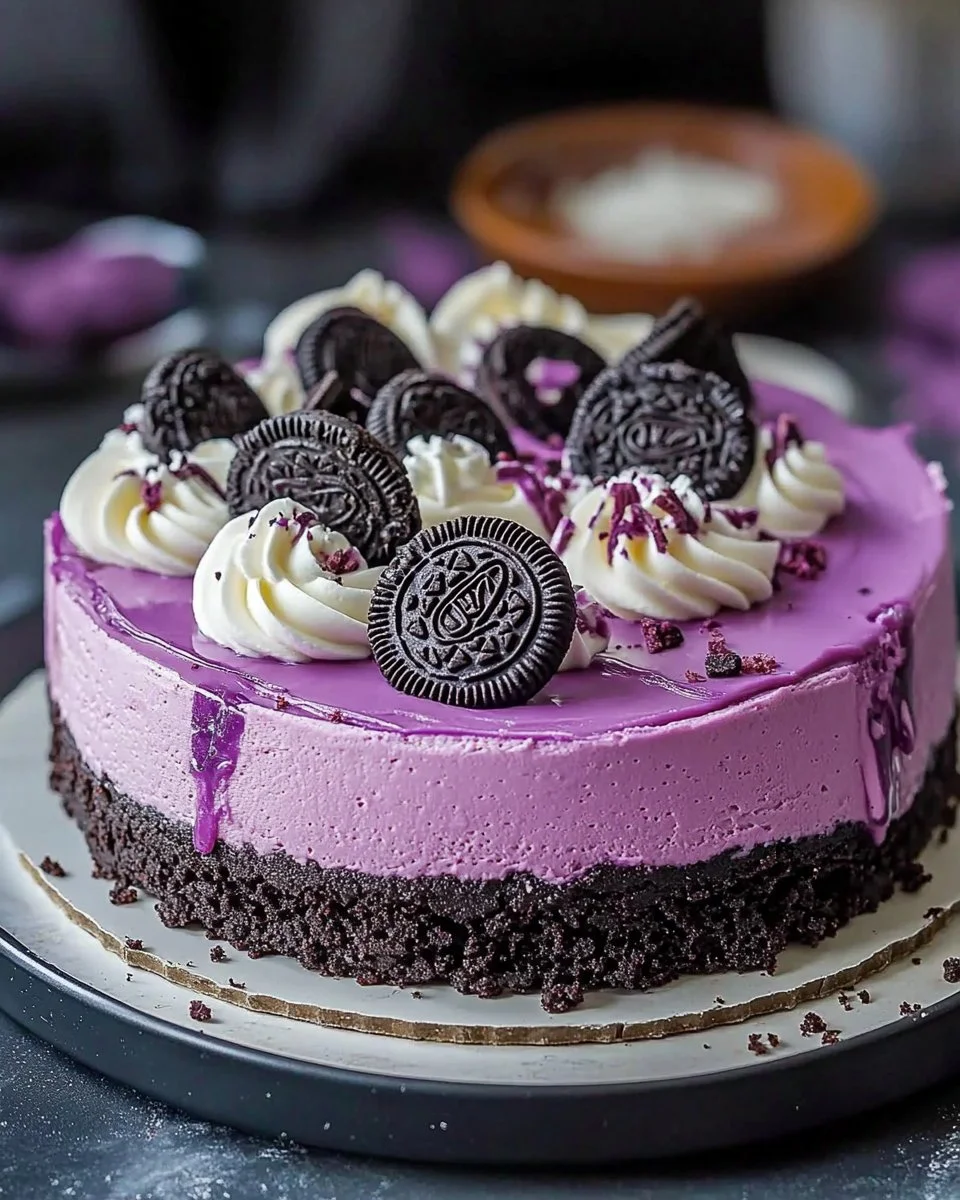
Welcome to the delightful world of desserts! If you’re on the hunt for a show-stopping treat that marries rich flavors with stunning visuals, look no further than this Decadent Ube Oreo Cheesecake. This recipe combines the creaminess of traditional cheesecake with the unique, sweet essence of ube, all nestled on a scrumptious Oreo crust. It’s a dessert that not only tastes amazing but also dazzles the eyes, making it perfect for gatherings or special occasions.
Whether you’re a dessert enthusiast or a home cook looking to impress, this cheesecake will quickly become a favorite in your repertoire. Trust me, once you try a slice, you’ll be hooked!
Reasons to Try This Delight
This recipe works wonders for numerous reasons. First and foremost, it’s surprisingly easy to prepare. Even if you’re new to baking, you’ll find that each step is straightforward, allowing you to create a gourmet dessert without the fuss. Additionally, the use of Oreos adds a delightful crunch that perfectly complements the creamy ube filling, creating a flavor profile that is both refreshing and indulgent.
You also won’t need to break the bank to whip up this treat. The ingredients are readily available at your local grocery store, making it a budget-friendly option for those who want to impress without overspending. Lastly, it’s a great make-ahead dessert; it tastes even better when chilled overnight, allowing the flavors to develop beautifully.
Simple Breakdown of the Cooking Process
Creating this Decadent Ube Oreo Cheesecake can be broken down into a few simple steps. You start by making the cookie crust, which is a quick mix and press process. Next, you’ll prepare the ube cheesecake batter, incorporating creamy ingredients until smooth and blended. The baking step involves a water bath to ensure a perfectly textured cheesecake, followed by a cooling period and a chilling time to set.
Finally, you get to add the finishing touches with whipped cream and Oreo crumbles. If you’re ready to create a dessert that looks as wonderful as it tastes, let’s dive into the details!
Ingredients
- 24 Oreo cookies (with filling)
- 5 tablespoons unsalted butter, melted
- 16 oz (2 blocks) cream cheese, softened
- 1 cup granulated sugar
- 1/2 cup ube halaya (ube jam)
- 1/4 cup ube extract
- 3 large eggs
- 1/2 cup sour cream
- 1 teaspoon vanilla extract
- 1/2 teaspoon salt
- 1/2 cup whipped cream
- Crushed Oreo cookies (for topping)
- White chocolate drizzle (optional)
This list includes some key ingredients worth mentioning. The ube halaya is a vital component, lending that signature purple hue and unique flavor. Ube extract amplifies this flavor, ensuring that every bite is bursting with ube goodness. Similarly, the creamy cream cheese blends beautifully with ube, creating a smooth and luscious filling. Don’t forget the Oreo cookies, which not only serve as the crust but also add that beloved chocolatey crunch!
Step-by-Step Instructions
Step 1: Prepare the Oreo Crust. Begin by preheating your oven to 325°F (163°C). Grease a 9-inch springform pan. It’s best to line the bottom with parchment paper for easy removal later on. Crush the Oreo cookies in a food processor until they turn into fine crumbs. In a bowl, mix the crumbs with the melted butter until fully combined. Press the mixture firmly into the bottom of the prepared pan. Pop it in the oven for 10 minutes to set, then allow it to cool as you prepare the filling.
Step 2: Make the Ube Cheesecake Batter. In a large mixing bowl, use a hand mixer or stand mixer to beat the softened cream cheese and granulated sugar together until smooth and creamy. Next, incorporate the ube halaya, ube extract, sour cream, vanilla extract, and salt, mixing until well combined. It’s essential to add the eggs one at a time, ensuring each is fully incorporated before adding the next to avoid overmixing, which can lead to cracks in your cheesecake.
Step 3: Bake the Cheesecake. Gently pour the ube cheesecake batter over your cooled Oreo crust. For the best baking results, wrap the bottom of the springform pan with aluminum foil to prevent water from leaking in, as you will place this pan in a larger dish filled with hot water—a technique known as a water bath. Bake for 50-60 minutes until the edges are set but the center remains slightly jiggly. When done, turn off the oven, crack the door open, and let the cheesecake cool in the oven for an hour. This gradual cooling helps prevent cracking.
Step 4: Chill & Decorate. Once cooled, transfer the cheesecake to the refrigerator and let it chill for at least 4 hours, though overnight is ideal for the best flavor and texture. Before serving, dress your cheesecake with a dollop of whipped cream, a sprinkle of crushed Oreos, and a drizzle of white chocolate for that extra flair!
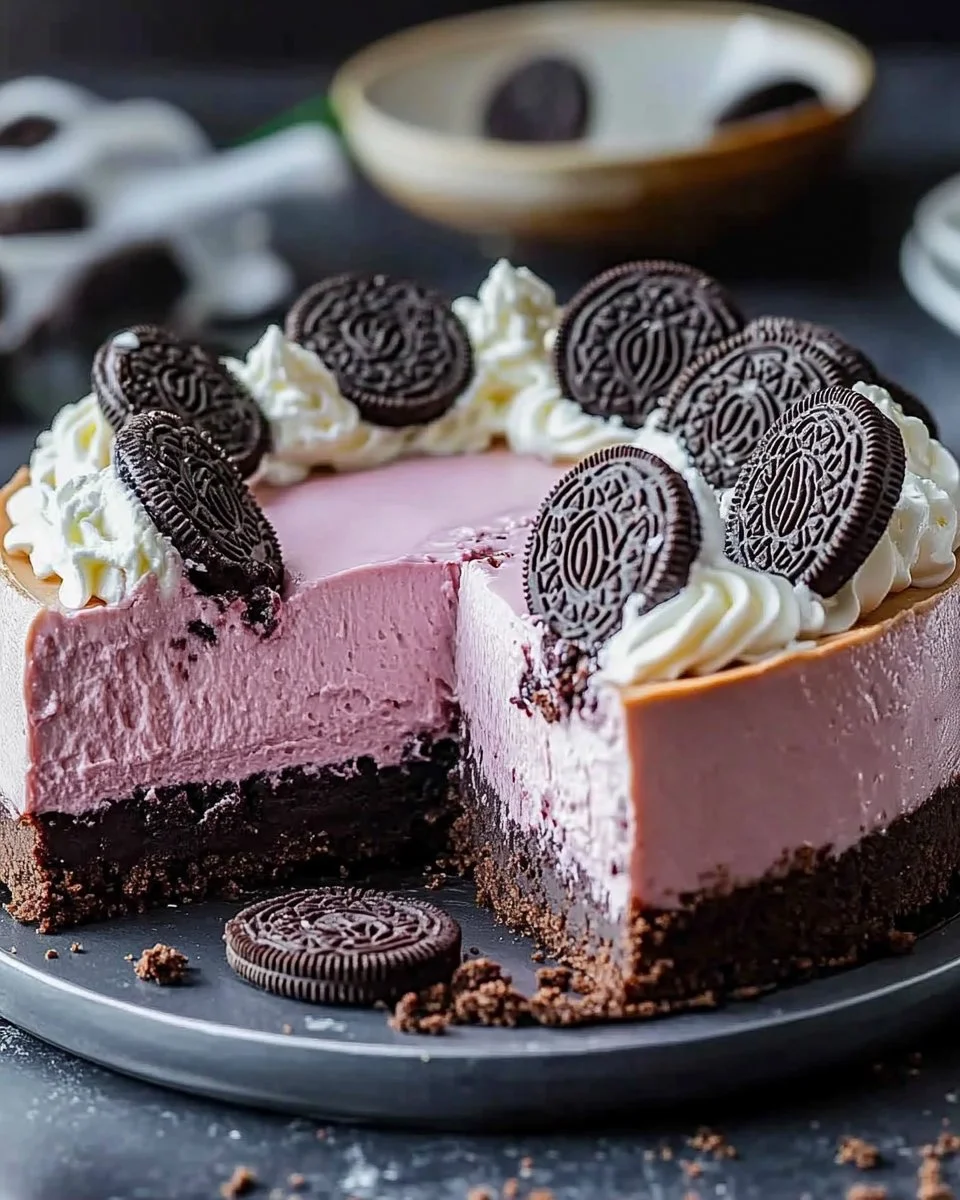
Step 5: Slice & Enjoy! When it’s time to enjoy, slice the cheesecake and serve it on dessert plates. The rich, creamy ube flavor paired with the chocolatey Oreo crust creates a delightful harmony of tastes that will have everyone coming back for seconds!
Best Way to Present This Dessert
This Ube Oreo Cheesecake shines as the star of any dessert table. Serve it during special occasions such as birthdays, holidays, or as a sweet treat for gatherings with friends and family. It pairs beautifully with a cup of coffee or tea, enhancing its rich flavors.
For an elevated experience, accompany it with fresh fruit that complements the sweetness, such as berries. You could also serve it with a side of vanilla ice cream to balance the richness with some creamy coolness.
How to Store Leftovers
To store your cheesecake, simply cover it with plastic wrap or place it in an airtight container and refrigerate. It should stay fresh for up to 5 days. If you haven’t consumed it all, you can freeze individual slices for longer storage. Just wrap each slice tightly in plastic wrap followed by aluminum foil, and it will keep in the freezer for up to 3 months.
To reheat, simply let the slice thaw in the refrigerator overnight. If you prefer it slightly warm, allow the cheesecake to sit at room temperature for about 30 minutes before serving. This ensures that the texture is divine when you take your first bite.
Expert Cooking Tips for Success
For a flawless cheesecake, here are a few tips. Firstly, ensure all ingredients are at room temperature before mixing; this will create a smoother batter and better texture. Secondly, when mixing the ingredients, avoid overbeating after adding the eggs, as this can incorporate too much air and cause cracks.
Additionally, using a water bath is essential for a creamy texture. It helps regulate the temperature, preventing the cheesecake from baking too quickly and cracking. Keep an eye on the baking time; every oven is different, so check for doneness a bit early to avoid overbaking.
Creative Twists on This Classic
While this decadent cheesecake is a standout as is, there are plenty of realistic variations to try. For a different flavor profile, consider swapping out the ube for other flavors, such as matcha or mango, keeping the same proportions for the cream cheese mixture. You can also layer the filling with a chocolate ganache for a rich twist.
If you want to experiment with the crust, try using other types of cookies, such as chocolate chip or graham crackers. Each brings a distinct flavor that could elevate the cheesecake in its own special way.
Common Questions Answered
- Can I make this cheesecake in advance? Yes! This cheesecake is perfect for making ahead of time; it can be stored in the fridge for up to 5 days.
- What if I can’t find ube halaya? You can substitute ube jam or make your own ube puree with boiled and mashed ube roots.
- Can I use low-fat cream cheese? While low-fat cream cheese can be used, it may slightly change the texture and flavor richness of the cheesecake.
- How can I tell when the cheesecake is done baking? The edges should be set while the center is slightly jiggly; it will continue to firm up as it cools.
- What’s the best way to cut the cheesecake without it sticking? Use a hot, clean knife to slice through the dessert, wiping it off after each cut for clean edges.