Introduction
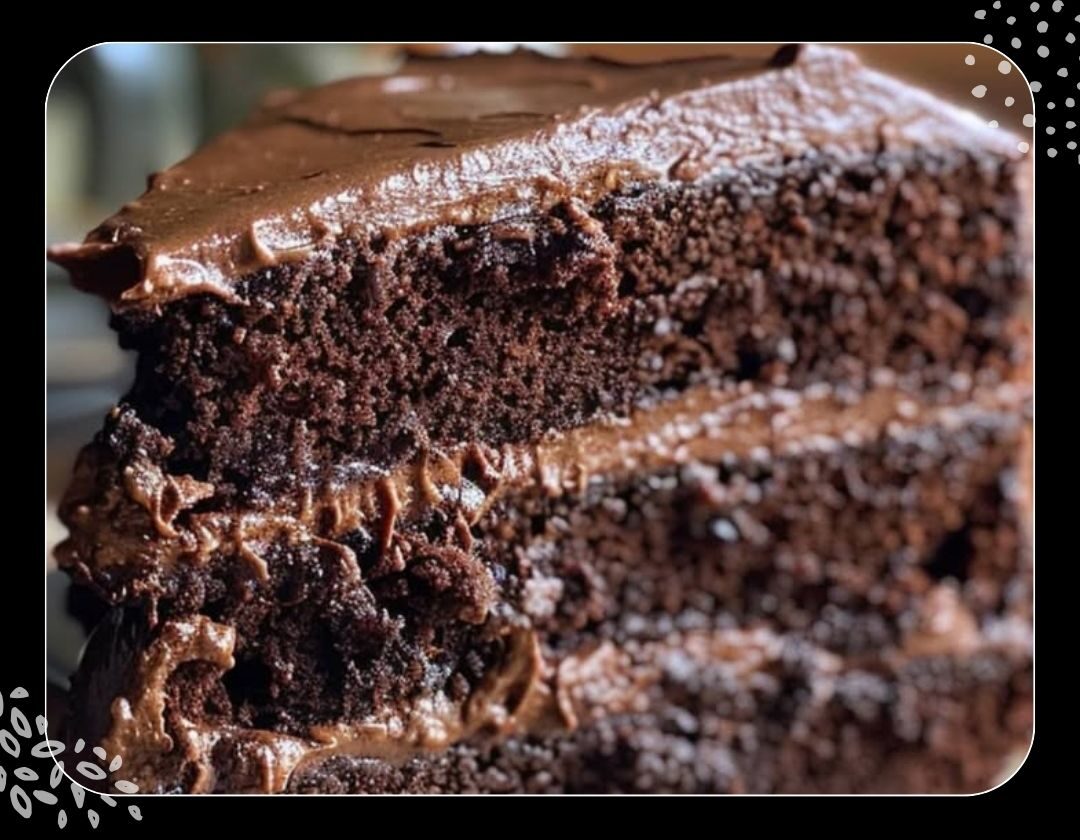
Ever tasted a soda in cake form? Sounds a bit strange, right? But what if I told you that a humble can of Dr. Pepper could transform an ordinary dessert into something magical? That’s the beauty of Dr. Pepper Cake—a rich, moist treat that brings together spice, cocoa, and that unmistakable Dr. Pepper zing. It’s like a Southern hug wrapped in chocolatey goodness!
Whether you’re baking for a potluck, a birthday, or just to satisfy that sweet tooth, this cake promises to be the star of the table. Let’s dive into this sweet adventure and explore everything you need to know about making the perfect Dr. Pepper Cake from scratch.
1. Ingredients You’ll Need
Let’s start with the essentials. Here’s everything you’ll need for both the cake and the icing:
For the cake:
2 cups all-purpose flour
1 tsp baking soda
1 tsp kosher salt
3/4 tsp ground cinnamon
1/2 tsp ground ginger
1 cup unsalted butter
2 cups granulated sugar
1 cup Dr. Pepper
1/4 cup unsweetened cocoa powder
1/2 cup buttermilk
2 large eggs, lightly beaten
2 tsp vanilla extract
For the icing:
1/2 cup Dr. Pepper
1/2 cup unsalted butter
3 cups powdered sugar
1/2 tsp vanilla extract
1/2 tsp kosher salt
1/8 tsp ground cinnamon
3-4 tbsp buttermilk
2. Why Use Dr. Pepper in Cake?
You might be wondering—what’s Dr. Pepper doing in my cake? Think of it like the secret ingredient in grandma’s recipe. The soda adds moisture, a slight fizz that lifts the batter, and a unique depth of flavor thanks to its blend of 23 signature spices.
It’s like adding a splash of mystery to your chocolate cake!
3. Prepping Your Pan the Right Way
Before you even think about mixing ingredients, preheat your oven to 375°F and grease a 9×13-inch pan. You can use butter, cooking spray, or even parchment paper for extra insurance against sticking.
A properly greased pan ensures your cake comes out in one beautiful piece—not in crumbs.
4. Mixing the Dry Ingredients
In a medium bowl, combine the following:
2 cups all-purpose flour
1 tsp baking soda
1 tsp kosher salt
3/4 tsp cinnamon
1/2 tsp ground ginger
This combo brings warmth and structure to your cake. Whisk it well so that everything is evenly distributed.
5. Creating the Dr. Pepper-Chocolate Mixture
This part feels like a little science experiment—and it smells amazing!
In a saucepan over medium heat:
Melt 1 cup of unsalted butter.
Stir in 2 cups of sugar, 1 cup Dr. Pepper, and 1/4 cup cocoa powder.
Bring the mixture to a gentle boil.
This will become the flavorful base that gives the cake its rich, velvety texture.
6. Combining the Mixtures
Now, pour the hot Dr. Pepper-chocolate mix into the dry ingredients. Stir until just combined. It might look a little lumpy at first—that’s okay!
The warm liquid starts to “wake up” the spices and cocoa, releasing incredible aromas.
7. Adding the Final Touches
Gently stir in:
1/2 cup buttermilk
2 lightly beaten eggs
2 tsp vanilla extract
These ingredients help the cake stay moist, rich, and slightly tangy. Be careful not to overmix—just enough to make everything smooth.
8. Baking Tips for a Moist Cake
Pour the batter into your prepared pan and bake for 25–30 minutes. You’ll know it’s done when a toothpick inserted in the center comes out clean.
Pro tip: Don’t open the oven too early—let the cake rise and set, or it might fall flat like a deflated balloon.
9. Making the Signature Dr. Pepper Icing
While your cake is cooling, get started on the icing.
In a small saucepan, reduce 1/2 cup Dr. Pepper over medium heat for 5–7 minutes until it thickens slightly.
Add 1/2 cup unsalted butter and stir until fully melted.
This reduction step concentrates the soda flavor, making the icing pop with sweet, fizzy goodness.
10. Getting the Right Icing Consistency
Remove the pan from the heat and whisk in:
3 cups powdered sugar
1/2 tsp vanilla extract
1/2 tsp kosher salt
1/8 tsp ground cinnamon
Then slowly add 3–4 tbsp buttermilk until you get a pourable glaze. You’re aiming for a consistency similar to warm honey—easy to drizzle, but not runny.
11. Pouring the Icing—Timing Matters!
Make sure your cake has cooled slightly but is still warm. This is key!
Pour the icing evenly over the top. It will seep into the surface, creating a shiny, flavorful coating. The heat helps it set just right.
12. Serving Suggestions
Slice the cake into squares and serve as-is, or top with:
Chopped pecans
A scoop of vanilla ice cream
Fresh berries
This cake is amazing warm or at room temperature. Either way, the flavors will make your taste buds dance.
13. Storing Your Dr. Pepper Cake
Store leftovers (if there are any!) in an airtight container:
Room temp: up to 3 days
Fridge: up to 5 days
Freezer: wrap individual pieces tightly and freeze for up to 2 months
Let it thaw completely before reheating or serving.
14. Customizing Your Cake
Want to get creative? Here are a few twists:
Add chocolate chips to the batter for extra richness
Swap cinnamon for nutmeg or cardamom
Use cherry-flavored Dr. Pepper for a fruity twist
Mix in crushed walnuts or shredded coconut
The base recipe is flexible, so make it your own!
15. Common Mistakes to Avoid
Here are a few rookie mistakes you’ll want to dodge:
Overmixing the batter – leads to dense cake
Skipping the soda reduction in icing – weakens flavor
Not greasing the pan properly – hello, stuck cake!
Using cold ingredients – causes uneven texture
Follow the steps carefully and you’re golden.
16. Conclusion
Dr. Pepper Cake isn’t just a dessert—it’s an experience. It brings together warm spices, rich cocoa, and a nostalgic soda twist in every bite. Whether you’re sharing it with family, impressing guests, or treating yourself, this cake is bound to become a favorite in your kitchen.
So go ahead—preheat that oven, grab a can of Dr. Pepper, and bake up a slice of happiness.
17. FAQs
1. Can I use diet Dr. Pepper for this recipe?
Yes, but the flavor and texture may change slightly due to artificial sweeteners.
2. What can I use instead of buttermilk?
You can mix 1/2 cup of milk with 1/2 tablespoon of lemon juice or vinegar as a quick substitute.
3. Can I make Dr. Pepper Cake gluten-free?
Absolutely! Use a 1:1 gluten-free flour blend for best results.
4. Do I need to reduce the Dr. Pepper for the icing?
Yes, reducing it intensifies the flavor and prevents the icing from being too watery.
5. Can I make cupcakes with this recipe?
Of course! Just reduce the baking time to around 18–20 minutes and check with a toothpick.
If you’ve never tried a Dr. Pepper Cake, now’s the time. It’s more than just a fun twist—it’s a celebration of flavor in every bite.