Introduction
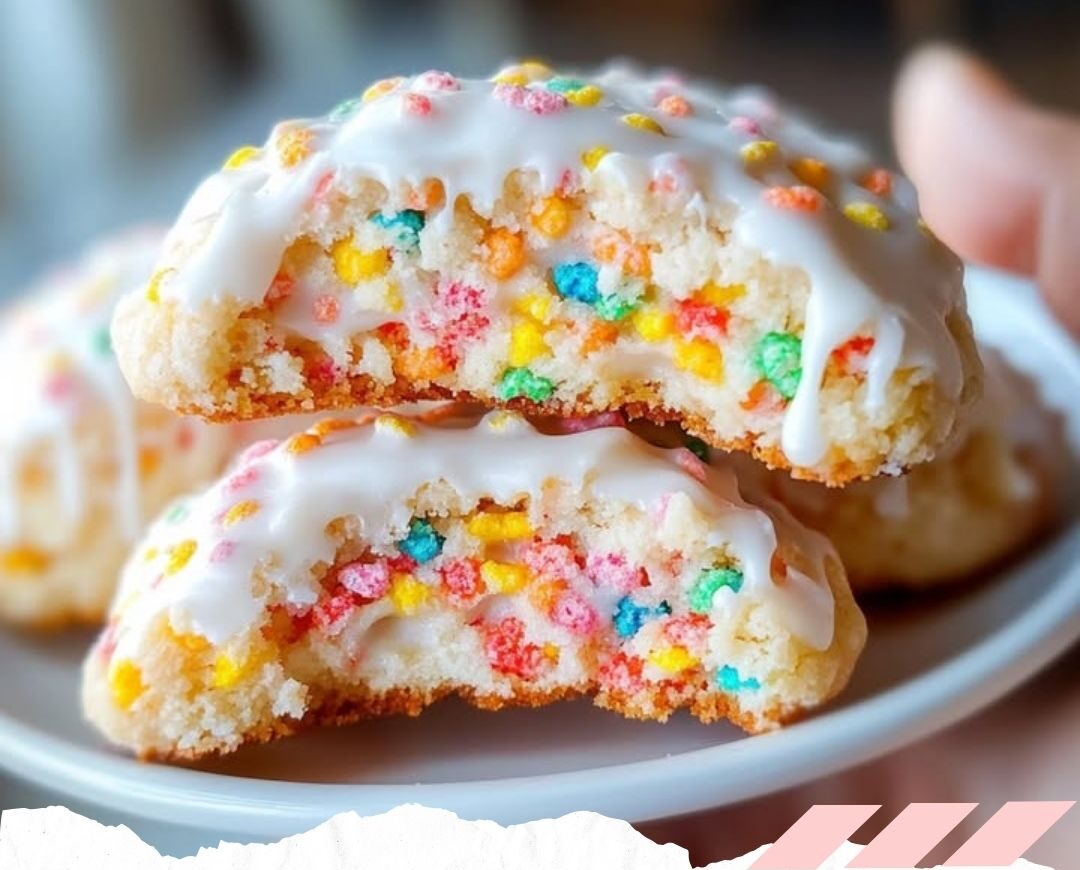
What happens when the nostalgia of Fruity Pebbles meets the decadence of cheesecake? Pure magic! Fruity Pebble Cheesecake Cookies are the perfect blend of crunchy, colorful cereal and creamy cheesecake filling. These cookies are not just a treat; they’re a party for your taste buds. Whether you’re baking for a special occasion or just want to indulge your sweet tooth, this recipe is here to impress. So, let’s dive into the deliciousness!
1. Ingredients Overview
For the Cookies:
- 1 cup unsalted butter, softened: This gives the cookies their rich, buttery flavor.
- 1 cup granulated sugar & 1/2 cup brown sugar: A mix of sugars ensures the perfect balance of sweetness and chewiness.
- 2 large eggs: Acts as a binder and adds moisture.
- 2 teaspoons vanilla extract: For that classic cookie aroma.
- 2 ½ cups all-purpose flour: The backbone of the cookie structure.
- 1 teaspoon baking powder & 1/2 teaspoon baking soda: Ensures the cookies rise perfectly.
- 1/2 teaspoon salt: Enhances flavor.
- 1 ½ cups Fruity Pebbles cereal: The star of the show, adding crunch and vibrant colors.
For the Cheesecake Filling:
- 8 oz cream cheese, softened: The creamy heart of the cookie.
- 1/4 cup powdered sugar: Adds sweetness without grittiness.
- 1/2 teaspoon vanilla extract: Complements the tanginess of the cream cheese.
For the Drizzle (Optional):
- 1 cup powdered sugar: The base for a simple glaze.
- 2-3 tablespoons milk: Adjusts consistency.
- 1/2 teaspoon vanilla extract: Adds a subtle flavor boost.
2. Tools You’ll Need
- Mixing bowls (medium and large)
- Electric hand mixer or stand mixer
- Baking sheets
- Parchment paper
- Measuring cups and spoons
- Wire cooling rack
- Spatula or cookie scoop
3. Preparing the Cheesecake Filling
Start by mixing the cream cheese, powdered sugar, and vanilla extract in a medium bowl. Beat the mixture until it’s smooth and creamy—no lumps allowed! Scoop out small teaspoon-sized dollops onto a parchment-lined baking sheet. Freeze these for at least 30 minutes; this step ensures the filling stays intact during baking.
4. Making the Cookie Dough
In a large bowl, cream the softened butter, granulated sugar, and brown sugar together until the mixture is light and fluffy. This usually takes about 2-3 minutes. Add the eggs one at a time, mixing well after each addition. Stir in the vanilla extract for a delightful aroma.
In a separate bowl, whisk together the dry ingredients: flour, baking powder, baking soda, and salt. Gradually incorporate the dry mixture into the wet mixture, stirring until just combined. Overmixing can make your cookies tough, so keep it gentle.
5. Incorporating Fruity Pebbles
Now comes the fun part! Gently fold in the Fruity Pebbles cereal. Make sure they’re evenly distributed throughout the dough to ensure every bite is packed with their fruity crunch.
6. Assembling the Cookies
Preheat your oven to 350°F (175°C) and line baking sheets with parchment paper. Scoop about 1 ½ tablespoons of cookie dough and flatten it slightly. Place a frozen cheesecake dollop in the center, then top with another scoop of dough. Seal the edges carefully to encase the filling.
Repeat this process for the remaining dough and filling. Place the assembled cookies about 2 inches apart on the prepared baking sheets.
7. Baking Tips for Perfection
Bake the cookies for 12-14 minutes or until the edges are lightly golden. Avoid overbaking to keep the centers soft and gooey. Let the cookies cool on the baking sheets for 5 minutes before transferring them to a wire rack to cool completely.
8. Optional Drizzle for Extra Flair
Mix powdered sugar, milk, and vanilla extract in a small bowl until smooth. Drizzle this over the cooled cookies for a touch of elegance and added sweetness. Use a fork or spoon for easy application.
9. Serving Suggestions
Serve these cookies slightly warm for the ultimate indulgence. Pair them with a glass of cold milk, a hot cup of coffee, or even a scoop of vanilla ice cream.
10. Storing and Freezing Tips
Storing:
Keep the cookies in an airtight container at room temperature for up to 4 days.
Freezing:
You can freeze the unbaked cookie dough balls for up to 3 months. Bake directly from frozen, adding an extra 1-2 minutes to the baking time.
11. Why These Cookies Stand Out
These cookies are a delightful twist on classic recipes. The combination of colorful Fruity Pebbles and creamy cheesecake filling makes them visually stunning and irresistibly delicious. They’re perfect for parties, bake sales, or simply satisfying a craving.
12. Nutritional Insights
Each cookie contains approximately:
- Calories: 230
- Carbohydrates: 30g
- Protein: 3g
- Fat: 10g
(Note: Values may vary based on exact ingredients used.)
13. Troubleshooting Common Issues
- Filling Leaks Out: Ensure the cheesecake filling is frozen solid before assembly.
- Cookies Spread Too Much: Chill the assembled cookies for 10-15 minutes before baking.
- Dry Cookies: Avoid overbaking and measure ingredients accurately.
14. Creative Variations
- Chocolate Lover’s Twist: Add mini chocolate chips to the dough.
- Gluten-Free Version: Use gluten-free flour.
- Holiday-Themed: Substitute Fruity Pebbles with seasonal cereals or sprinkles.
15. Conclusion and FAQs
Fruity Pebble Cheesecake Cookies are the ultimate dessert for those who love a blend of fun and flavor. With their vibrant colors and creamy centers, they’re sure to be a hit. So grab your ingredients and start baking!
FAQs
1. Can I use a different cereal? Absolutely! Try Cocoa Pebbles or a similar cereal for a different flavor profile.
2. How do I prevent the filling from melting out? Freezing the cheesecake filling and properly sealing the cookie dough around it are key steps.
3. Can I make these cookies ahead of time? Yes, you can freeze the dough or baked cookies and enjoy them later.
4. What if I don’t have a mixer? You can mix by hand, but ensure the butter and sugars are thoroughly combined for the best texture.
5. Are these cookies suitable for kids? Definitely! Kids will love the vibrant colors and creamy centers.

