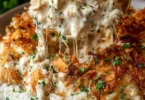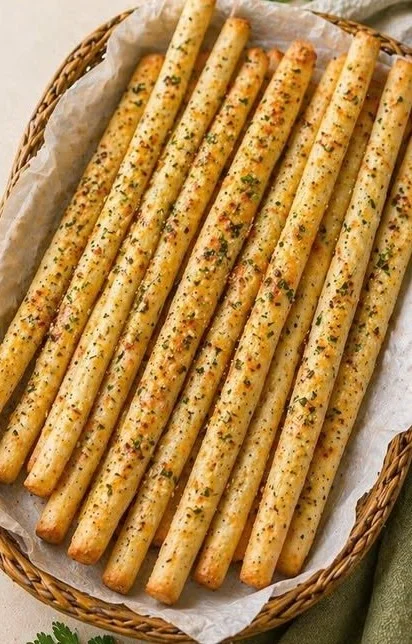
Ah, garlic bread sticks—who can resist this delightful treat? These thin and crispy delights are not just a side dish; they’re an experience! Imagine sinking your teeth into perfectly baked bread sticks infused with the mouthwatering aroma of garlic and herbs. Whether you’re serving them alongside a comforting pasta dish, enjoying them with a hot bowl of soup, or savoring them on their own, these garlic bread sticks are bound to become a favorite in your home.
This recipe is not only simple but also incredibly satisfying, making it an easy choice for both novice cooks and experienced chefs. With just a handful of ingredients and a little bit of time, you’ll create an irresistible snack that will have everyone asking for more.
What Makes These Garlic Bread Sticks So Appealing
One of the reasons this recipe stands out is its simplicity. You don’t need fancy equipment or hard-to-find ingredients. You can whip these garlic bread sticks up in less than an hour, including the rising time! Plus, they are budget-friendly, using everyday staples that you likely already have in your kitchen.
The combination of warm, soft bread with a crispy exterior creates a lovely texture, while the buttery garlic topping adds a burst of flavor that elevates them to perfection. These bread sticks are versatile too! They can accompany a hearty meal or serve as an appetizer for gatherings. They’re an excellent way to impress your guests without excessive effort.
An Easy Breakdown of the Cooking Process
The process of making garlic bread sticks is straightforward. You’ll begin by activating the yeast in a mixture of warm milk and water with a touch of sugar. Once foamy, you’ll combine it with flour and salt, then knead into a smooth dough. After allowing it to rise and punch it down, roll it out into thin sticks. A brush of melted garlic butter and a quick bake turns the dough into crispy, flavorful masterpieces!
This recipe keeps the steps uncomplicated, making it accessible for any home cook. It’s not just about following instructions; it’s about enjoying the process of making something delicious from scratch.
Ingredients
Prep Time: 15 minutes
Cook Time: 18 minutes
Total Time: 1 hour 33 minutes
Servings: 12 sticks
- 2 1/4 cups all-purpose flour
- 1/2 cup milk (lukewarm)
- 1/4 cup water (lukewarm)
- 1 tsp active dry yeast
- 2 tsp sugar
- 5 1/2 tbsp butter (soft, divided)
- 1 tbsp garlic (minced)
- 1/2 tbsp dried oregano
- 1 tsp salt
- Black pepper (to taste)
The key ingredients here are essential. The flour serves as the base, while the yeast is what gives these sticks their lovely rise. Lukewarm milk and water create the perfect environment for the yeast to activate. Don’t forget the garlic—it’s the star of the show, contributing a rich, savory flavor!

Step-by-Step Instructions
Follow these detailed steps to create your garlic bread sticks:
- In a bowl, mix lukewarm milk, water, sugar, and yeast. Allow this mixture to sit for 5-10 minutes until it becomes foamy. This step is crucial for activating the yeast, giving your bread the fluffy texture we all love.
- Add in the flour and salt. Mix until a dough begins to form, then knead it on a floured surface until it reaches a smooth consistency.
- Incorporate 1 tablespoon of butter into the dough. Knead it for an additional 8-10 minutes until the dough becomes soft and elastic. If the dough is too sticky, sprinkle a little more flour as you go.
- Cover the dough with a clean kitchen towel and let it rise in a warm area for 1 hour or until it has doubled in size. This is the magic moment when your bread will puff up!
- Once risen, punch down the dough to release any air, and roll it out thinly on a floured surface. You want it about 1/8 inch thick for that perfect crispy texture.
- Cut the rolled dough into long thin sticks. They can be uniform or rustic—either way, they’ll taste fantastic.
- Arrange the sticks on a lined baking tray and allow them to rest for an additional 15 minutes. This rest period helps them puff slightly before baking.
- Meanwhile, melt the remaining butter and mix it with the minced garlic, dried oregano, salt, and black pepper in a small bowl. This garlicky mixture is what will make each stick shine!
- Generously brush this mixture over the unbaked sticks. Don’t hold back; you want every bite to be infused with flavor!
- Bake the sticks in a preheated oven at 180°C (350°F) for 15-18 minutes or until they are golden brown and slightly crispy. Keep an eye on them near the end to ensure they don’t over-brown.
- For an extra touch, brush the sticks again with the melted garlic butter right after they come out of the oven. Serve hot and enjoy!
Perfect Pairings for Garlic Bread Sticks
When it comes to serving these garlic bread sticks, the possibilities are endless! They are fabulous on their own, but consider pairing them with:
- Pasta Dishes: Serve them alongside your favorite marinara or Alfredo pasta for a complete meal.
- Soups: Pair them with a hearty bowl of minestrone or creamy tomato soup for a comforting dish.
- Salads: Use them to complement a fresh garden salad, adding wonderful crunch.
- Dips: They work great with dips like hummus or spinach artichoke dip as an appetizer.
- Occasions: Perfect for family dinners, game nights, or casual entertaining!
How to Store and Reheat Garlic Bread Sticks
If you have leftovers (which might be a rarity), storing them is quite simple. Allow the sticks to cool completely, then transfer them to an airtight container. They can last in the fridge for up to 3-4 days.
For longer storage, consider freezing them. Place the cooled sticks in a freezer-safe bag and store for up to 2 months. To reheat, simply remove them from the freezer and let them thaw for a few minutes. Preheat your oven to 180°C (350°F), then bake for 5-10 minutes to restore their crispy texture.
Expert Advice for Making the Best Garlic Bread Sticks
Here are some pro tips to keep in mind:
- Check Your Yeast: If your yeast doesn’t foam during the activation step, it may be expired. Always test it to ensure the best rise.
- Kneading Technique: Knead until your dough is smooth and elastic. Over-kneading can result in tough bread, while under-kneading can lead to a dense texture.
- Oven Temperature: Every oven is different. Keep an eye on the bread sticks as they bake, and adjust your baking time as necessary.
- Customize Your Topping: Feel free to add grated cheese or extra herbs to your garlic butter for a twist on flavor!
Customization Options for Your Bread Sticks
Don’t be afraid to get creative with these garlic bread sticks! Here are some ideas:
- Cheesy Garlic Sticks: Add shredded mozzarella or Parmesan cheese to the dough for extra richness.
- Herb Variation: Experiment with different herbs, such as basil or thyme, to change up the flavor profile.
- Spicy Kick: Add a pinch of red pepper flakes to the garlic butter for a bit of heat.
- Gluten-Free Version: Substitute all-purpose flour with a gluten-free blend suitable for baking.
Common Questions About Garlic Bread Sticks
Here are some frequently asked questions that might help you on your garlic bread stick journey:
- Can I use dried garlic instead of fresh?
Yes, you can use garlic powder as a substitute! Use about 1 teaspoon of garlic powder for each tablespoon of fresh garlic. - What if my bread sticks are too thick?
If your sticks are thicker than 1/8 inch, they may take longer to bake. Just keep an eye on them to avoid burning. - Can I make dough ahead of time?
Absolutely! You can prepare the dough, let it rise, and refrigerate it overnight. Just allow it to come to room temperature before shaping and baking. - Can I double the recipe?
Yes, just use a bigger bowl for mixing and ensure your baking tray can accommodate the extra sticks! - Do I have to brush them with butter?
While it enhances the flavor, you can omit the butter if you’re looking for a lighter option.