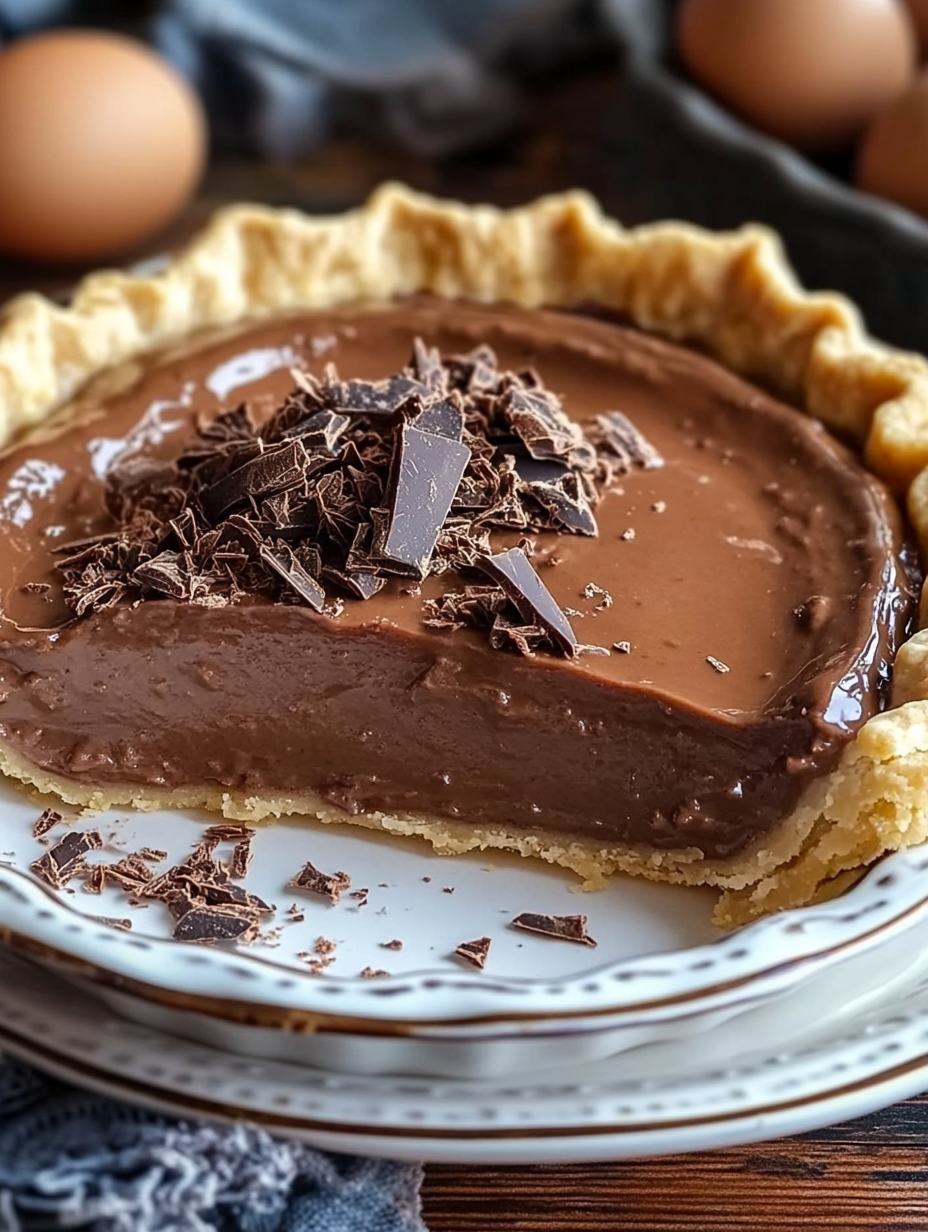
There’s something magical about recipes passed down through generations. They don’t just feed your stomach—they feed your soul. Grandma’s Chocolate Pie is one of those timeless desserts that feels like a warm hug on a plate. It’s rich, silky, and deeply chocolatey, yet made with simple pantry ingredients you probably already have at home.
Have you ever taken a bite of something and instantly felt like a kid again? That’s exactly what Grandma’s Chocolate Pie does. It’s not fancy. It’s not complicated. It’s just honest, homemade goodness—like a handwritten letter in a world full of texts.
In this article, we’ll walk through everything you need to know about making the perfect Grandma’s Chocolate Pie, from ingredients and step-by-step instructions to helpful tips and FAQs.
Table of Contents
| Sr# | Headings |
|---|---|
| 1 | The Story Behind Grandma’s Chocolate Pie |
| 2 | Why You’ll Love This Classic Recipe |
| 3 | Ingredients You’ll Need |
| 4 | Preparation, Cook Time & Servings |
| 5 | Step-by-Step Directions |
| 6 | Tips for the Perfect Chocolate Filling |
| 7 | Choosing the Right Pie Shell |
| 8 | Common Mistakes to Avoid |
| 9 | How to Know When the Pie Is Thick Enough |
| 10 | Chilling & Setting the Pie Properly |
| 11 | Serving Suggestions |
| 12 | Storing Grandma’s Chocolate Pie |
| 13 | Variations You Can Try |
| 14 | Why This Recipe Stands the Test of Time |
| 15 | Final Thoughts |
1. The Story Behind Grandma’s Chocolate Pie
Every family seems to have that one dessert everyone requests during holidays. For many of us, that dessert is Grandma’s Chocolate Pie. It’s the kind of pie that shows up at Thanksgiving, Sunday dinners, and random Tuesdays when someone needs cheering up.
Unlike modern desserts loaded with complicated steps, this pie is beautifully simple. It reflects a time when recipes were made from scratch with love and patience.
2. Why You’ll Love This Classic Recipe
What makes Grandma’s Chocolate Pie so special?
Simple ingredients
No complicated techniques
Rich, smooth texture
Deep chocolate flavor
It’s like comfort food dressed in chocolate. You don’t need fancy tools or professional skills—just a pot, a spoon, and a little patience.
3. Ingredients You’ll Need
Here are the exact ingredients for Grandma’s Chocolate Pie:
½ c. cocoa
¼ cup cornstarch
3 egg yolks
1 ½ c. sugar
¼ tsp. salt
2 c. milk
1 tsp. vanilla
That’s it. No surprises. No hidden extras. Just classic ingredients that come together beautifully.
Each one plays an important role:
Cocoa gives the rich chocolate flavor.
Cornstarch thickens the filling.
Egg yolks add richness and structure.
Sugar balances the cocoa’s bitterness.
Milk creates creaminess.
Vanilla enhances the chocolate flavor.
Salt brings everything together.
4. Preparation, Cook Time & Servings
Here’s what you need to plan for:
Preparation Time: 10 minutes
Cook Time: 10–12 minutes
Chill Time: 2–4 hours
Total Time: Approximately 2 hours 25 minutes
Servings: 8 slices
This makes it perfect for family dinners or small gatherings.
5. Step-by-Step Directions
Follow these instructions exactly for authentic Grandma’s Chocolate Pie:
Mix cocoa, cornstarch, beaten egg yolks, sugar, salt, and vanilla in a pot.
Gradually add milk while stirring over medium-high heat.
Cook until thick, beating it smooth.
Pour into a pre-baked pie shell.
Put in the fridge to chill.
That’s it! Simple, right?
6. Tips for the Perfect Chocolate Filling
Whisk Constantly
Stirring prevents lumps. Think of it like keeping a conversation going—you don’t want awkward pauses that turn into clumps!
Medium-High Heat Is Key
Too low, and it won’t thicken properly. Too high, and it may scorch. Stay attentive.
Beat It Smooth
When the mixture thickens, keep beating until silky. A smooth texture is what makes Grandma’s Chocolate Pie unforgettable.
7. Choosing the Right Pie Shell
This recipe calls for a pre-baked pie shell. You can use:
Traditional pastry crust
Store-bought crust
Homemade crust
Make sure it’s fully baked and cooled before adding the filling. A soggy crust can ruin the experience.
8. Common Mistakes to Avoid
Even simple recipes can go wrong. Here’s what to watch out for:
Not stirring enough
Overcooking the mixture
Pouring filling into a warm crust
Not chilling long enough
Patience is your best friend here.
9. How to Know When the Pie Is Thick Enough
Wondering when to stop cooking?
The mixture should coat the back of a spoon. When you drag your finger across it, the line should stay clear. It will also bubble slightly and feel pudding-like.
Remember, it thickens more as it cools.
10. Chilling & Setting the Pie Properly
Chilling is not optional—it’s essential.
Place the pie in the fridge for at least 2 hours, though 4 hours is even better. This allows the filling to fully set.
Cover loosely with plastic wrap to prevent a skin from forming.
11. Serving Suggestions
You can enjoy Grandma’s Chocolate Pie as is, or add:
Whipped cream
Chocolate shavings
A dusting of cocoa powder
Serve chilled for the best texture. Each slice should hold its shape while remaining creamy.
12. Storing Grandma’s Chocolate Pie
Store in the refrigerator, covered, for up to 4 days.
Avoid freezing—it can affect texture and make the filling watery when thawed.
13. Variations You Can Try
While keeping the original recipe intact, you can experiment with toppings or crust types.
Graham cracker crust
Oreo crust
Toasted coconut topping
But honestly? The original version is hard to beat.
14. Why This Recipe Stands the Test of Time
Trendy desserts come and go. But Grandma’s Chocolate Pie remains.
Why?
Because it’s dependable. It’s nostalgic. It’s comforting. Like your favorite old sweater, it never lets you down.
In a world chasing new flavors and viral recipes, this pie quietly reminds us that simple is powerful.
15. Final Thoughts
At the end of the day, Grandma’s Chocolate Pie isn’t just dessert—it’s a memory-maker. It’s the kind of recipe you pass down, handwritten on a stained recipe card.
It proves that you don’t need complicated ingredients or hours in the kitchen to create something unforgettable. All you need is a few basics, a little care, and the willingness to stir until smooth.
So go ahead. Make it. Share it. Create your own sweet memories.
FAQs About Grandma’s Chocolate Pie
1. Can I make Grandma’s Chocolate Pie ahead of time?
Yes! In fact, it’s better when made a few hours ahead so it has time to chill and set properly.
2. Can I use whole eggs instead of egg yolks?
This recipe specifically calls for 3 egg yolks for richness and texture. Using whole eggs may change the consistency.
3. How do I prevent lumps in the filling?
Whisk constantly while cooking and gradually add the milk to ensure smooth blending.
4. Why didn’t my pie thicken properly?
It may not have cooked long enough. The mixture should reach a thick, pudding-like consistency before removing from heat.
5. Can I freeze Grandma’s Chocolate Pie?
Freezing is not recommended, as it can affect the creamy texture once thawed.
There you have it—everything you need to make the perfect Grandma’s Chocolate Pie. Simple, classic, and absolutely delicious. 🍫🥧