Introduction
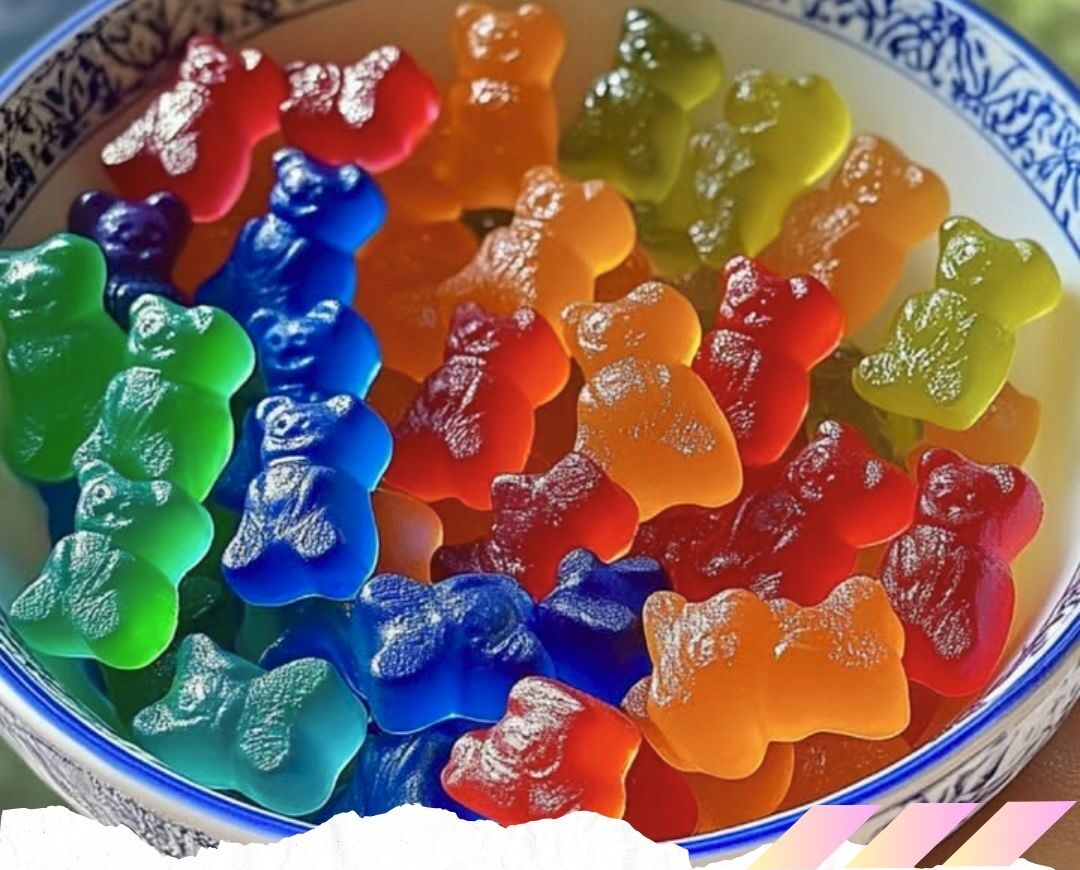
Ever wished you could create your very own colorful, flavorful gummy candies at home? Well, now you can! With just a few simple ingredients and a little bit of patience, you’ll be popping tasty homemade Kool-Aid Gummy Treats in no time. Whether you’re crafting snacks for a party, bonding with kids in the kitchen, or satisfying your sweet tooth, this recipe promises fun and flavor in every bite.
Ingredients You’ll Need
Here’s what you need to make these delightful treats:
- 1 cup water
- ½ cup granulated sugar
- 2 packets of Kool-Aid (any flavors you like)
- 3 tablespoons unflavored gelatin
These ingredients are easy to find, budget-friendly, and perfect for a quick kitchen adventure.
Why Make Your Own Gummies?
Why buy store-bought gummies when you can make your own? Not only is it more cost-effective, but you also get full control over flavors, colors, and sweetness. Plus, it’s a fantastic activity to do with kids – they love picking the flavors and filling the molds. Homemade gummies are also fresher and free from unwanted preservatives.
Choosing Your Kool-Aid Flavors
The best part about Kool-Aid Gummy Treats is the flavor variety. From tropical punch to grape, you can mix and match flavors to create unique combinations. Feeling adventurous? Try combining two flavors for a layered effect!
Step 1: Heating the Base
Start by combining 1 cup of water and ½ cup of granulated sugar in a small saucepan over medium heat. Stir gently until the sugar dissolves completely. You’ll know it’s ready when the mixture is clear and smooth.
Step 2: Adding the Flavor
Once your base is ready, stir in 2 packets of Kool-Aid. Mix thoroughly until the powder dissolves and the liquid takes on a vibrant hue. The smell alone will make your mouth water!
Step 3: Blooming the Gelatin
Next, slowly sprinkle 3 tablespoons of unflavored gelatin into the mixture, one tablespoon at a time. Whisk constantly to avoid clumping. Let it sit for 2-3 minutes to “bloom,” giving the gelatin time to absorb the liquid and thicken.
Step 4: Melting and Mixing
Place the saucepan back on low heat. Stir gently until the gelatin completely dissolves. Be patient – this step ensures smooth gummies. Avoid boiling the mixture, as it can affect the texture.
Step 5: Molding the Gummies
Once your mixture is smooth, carefully pour it into silicone molds. Use a dropper for precision if needed. Gummy bear molds are popular, but you can get creative with shapes like hearts, stars, or dinosaurs.
Step 6: Chilling and Setting
Place the filled molds in the refrigerator for 2-3 hours. During this time, the gelatin will set, transforming the liquid into delightful gummy treats.
Step 7: Popping and Enjoying
Once set, gently pop the gummies out of the molds. Store them in an airtight container to keep them fresh. Now comes the best part – enjoying your homemade Kool-Aid Gummy Treats!
Storage Tips for Fresh Gummies
Keep your gummies in an airtight container at room temperature for up to one week or in the refrigerator for up to two weeks. For longer storage, freeze them in a sealed container.
Fun Variations to Try
- Sour Gummies: Add a sprinkle of citric acid to the molds before pouring the mixture.
- Layered Gummies: Pour different Kool-Aid flavors in layers, chilling each layer before adding the next.
- Vitamin Boost: Stir in powdered vitamins or collagen for a nutritious twist.
Troubleshooting Tips
- Gummies Too Soft? Increase the gelatin by one tablespoon.
- Too Firm? Reduce the gelatin slightly.
- Clumps in the Gelatin? Whisk thoroughly while adding the gelatin.
Perfect Occasions for Kool-Aid Gummies
These gummies are perfect for:
- Birthday parties
- School snacks
- Gifts in cute jars
- Movie nights
Frequently Asked Questions (FAQs)
1. Can I use sugar-free Kool-Aid? Yes! Just keep in mind that the gummies may be slightly less sweet.
2. How do I prevent gummies from sticking to molds? Lightly spray the molds with cooking spray before pouring the mixture.
3. Can I double the recipe? Absolutely! Just ensure your saucepan is large enough to handle the increased volume.
4. Do I have to refrigerate the gummies? While refrigeration helps them set faster, they can be stored at room temperature once set.
5. Can I use flavored gelatin instead of Kool-Aid? You can, but Kool-Aid gives the gummies a unique punch of flavor and vibrant color.
Conclusion
Making your own Kool-Aid Gummy Treats is a fun, easy, and rewarding experience. Whether you’re crafting them for a party, a snack, or simply to satisfy your candy cravings, these gummies are guaranteed to be a hit. So, gather your ingredients, pick your favorite flavors, and start creating these colorful, chewy delights today!