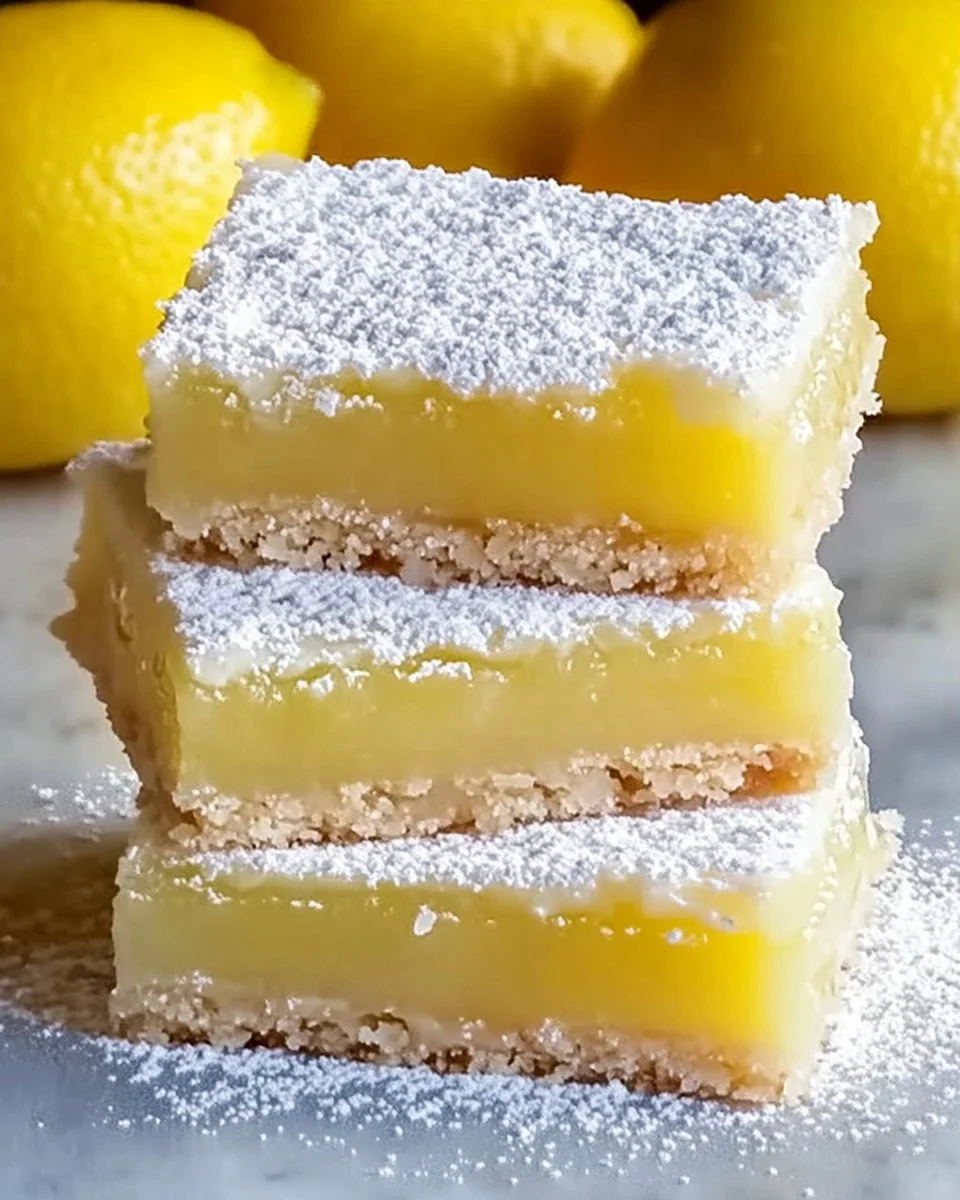
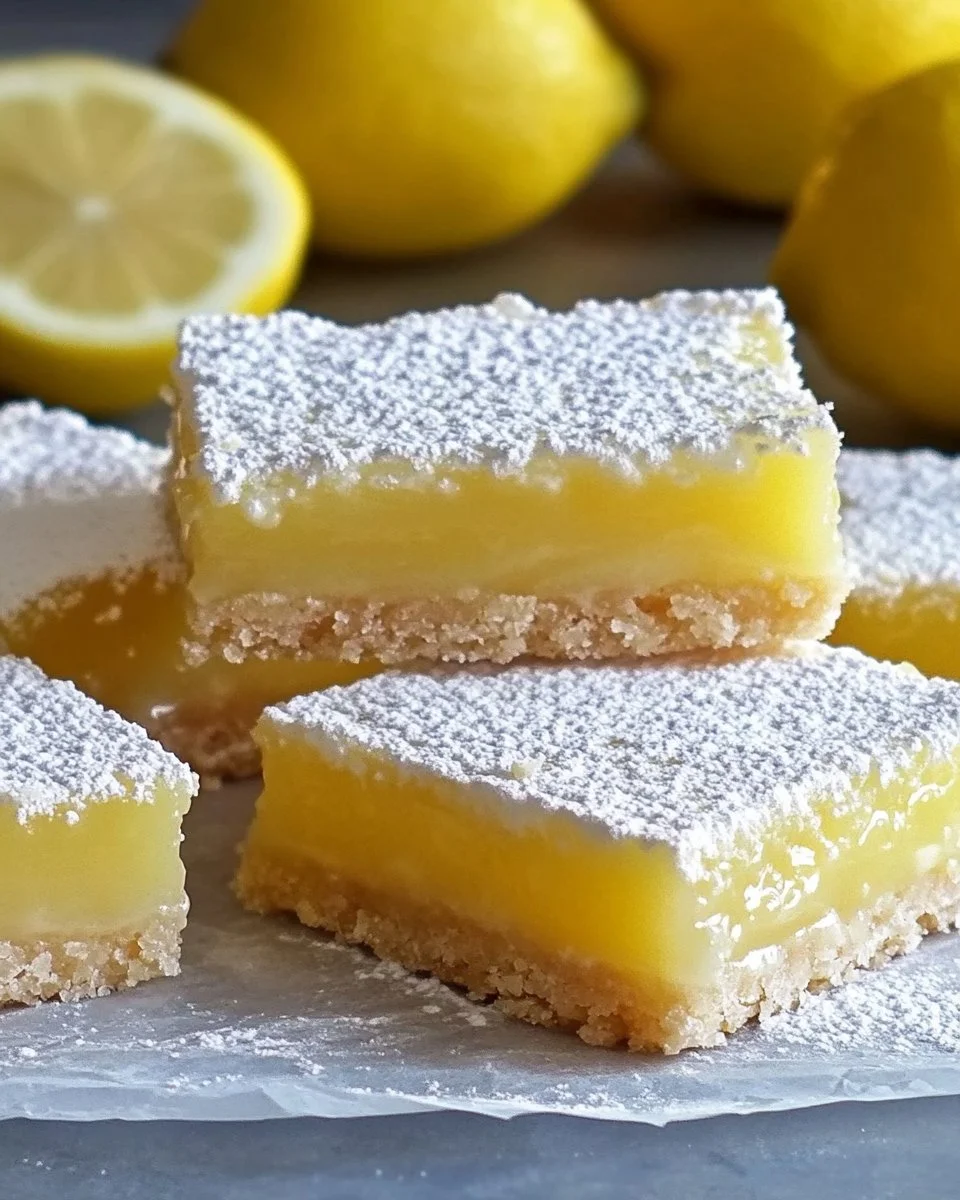
If you’re looking for a dessert that brings sunshine to your table, look no further than these delightful Limoncello Bars. Bursting with zesty lemon flavor and a hint of Italian limoncello, this treat is both refreshing and indulgent. Perfect for warm weather gatherings or simply to brighten your day, these bars provide a tangy, sweet contrast that will leave your taste buds dancing. Whether you’re hosting a summer barbecue or need a delightful potluck contribution, these easy-to-make bars are sure to impress.
What Makes This Recipe Stand Out
This recipe for Limoncello Bars stands out due to its simplicity and stunning flavor profile. Not only are the ingredients easy to find, but the steps are also straightforward, making it accessible for even novice bakers. The combination of a buttery crust with a creamy, tart filling creates a balance that is satisfying and delicious. Plus, each bite captures a taste of Italy, transporting you to a sun-soaked terrace with each citrusy mouthful. It’s a quick dessert that feels special but won’t take hours to prepare.
A Quick Look at How to Create This Delight
Making Limoncello Bars involves two main components: the crust and the filling. You’ll start by preparing a simple buttery crust that serves as the base. After baking it to a golden perfection, you’ll whisk together the filling ingredients, which include fresh lemon juice and limoncello, for that unmistakable flavor. Once you’ve poured the filling over the baked crust, a final bake ensures everything sets beautifully. The result is a deliciously tangy treat that can be enjoyed chilled or at room temperature.
Ingredients
Gather the following ingredients to create these Limoncello Bars:
- 1 cup all-purpose flour
- 1/4 cup granulated sugar
- 1/4 teaspoon salt
- 1/2 cup unsalted butter, cold and cubed
- 3 large eggs
- 3/4 cup granulated sugar
- 1/4 cup all-purpose flour
- 1/4 cup fresh lemon juice
- 2 tablespoons limoncello liqueur
- 1 teaspoon lemon zest
- Powdered sugar, for dusting
The all-purpose flour gives structure to both the crust and the filling, while the combination of fresh lemon juice and limoncello liqueur infuses the bars with refreshing flavor. The eggs help the filling set, creating a creamy texture that pairs perfectly with the flaky crust.
Simple Steps to Bake Limoncello Bars
Follow these easy steps to create your Limoncello Bars:
- Preheat the oven: Start by preheating your oven to 350°F (175°C). This ensures your bars bake evenly.
- Prepare your baking pan: Line an 8-inch baking pan with parchment paper, allowing some overhang. This will make it easier to lift the bars out once they’re cooled.
- Make the crust: In a medium bowl, combine 1 cup of flour, 1/4 cup of granulated sugar, and 1/4 teaspoon of salt. Add the cold, cubed butter into the mixture. Using a pastry cutter or fork, cut in the butter until the mixture resembles coarse crumbs.
- Press and bake the crust: Evenly press the crumb mixture into the bottom of the prepared pan. Bake for 15 minutes, or until it turns lightly golden. Keep an eye on it to avoid over-baking.
- Whisk together the filling: In a large bowl, whisk the 3 eggs, 3/4 cup of granulated sugar, 1/4 cup of flour, 1/4 cup of fresh lemon juice, 2 tablespoons of limoncello, and 1 teaspoon of lemon zest. Mix until everything is smooth and well combined.
- Pour the filling: Once the crust is baked, remove it from the oven and carefully pour the lemon filling over the warm crust.
- Bake again: Return the pan to the oven and bake for an additional 20-25 minutes, or until the filling is set and slightly golden on top. You can test for doneness by gently shaking the pan; the filling should not jiggle.
- Cool and dust: Allow the bars to cool completely in the pan. Once cool, dust the top with powdered sugar for an added touch of sweetness.
- Slice and serve: Use the parchment overhang to lift the bars out of the pan. Slice into squares and enjoy chilled or at room temperature.
Tip: Make sure your butter is cold when preparing the crust. This helps create a flakier texture and adds richness to the base.
Creative Ways to Serve Limoncello Bars
These Limoncello Bars are delicious on their own, but you can enhance your serving experience by pairing them with various accompaniments. Consider serving them alongside:
- A scoop of vanilla ice cream or a dollop of whipped cream to balance the tartness.
- A fresh fruit salad that includes berries and citrus for a complementary flavor.
- A sprig of fresh mint to decorate each bar, adding an aromatic touch.
- A glass of chilled sparkling water or lemonade, perfect for a warm day.
- Ideal for garden parties, brunch gatherings, or as a sweet treat after dinner.
Each option brings something unique to the table, making your dessert presentation as memorable as the taste itself.
Keeping Your Limoncello Bars Fresh
These delicious bars can be stored easily to maintain their freshness. Follow these guidelines:
- Refrigerator: Store the cooled bars in an airtight container in the fridge for up to a week. The cool environment helps maintain their flavor and texture.
- Freezer: If you want to keep them longer, you can freeze the bars. Wrap them tightly in plastic wrap and then place them in an airtight container or a freezer bag. They can last for up to three months in the freezer.
When you are ready to enjoy from frozen, allow them to thaw in the refrigerator overnight for the best texture.
Expert Tips for the Best Results
Here are some handy tips to ensure your Limoncello Bars turn out perfectly every time:
- Make sure to measure your flour accurately. Too much flour can make the crust dense and heavy.
- Using fresh lemon juice is key. Bottled lemon juice may not provide the same bright flavor, so squeeze those lemons!
- Don’t rush the cooling process. Allowing the bars to cool completely helps achieve the right texture and makes them easier to cut.
- For an extra lemony flavor, consider adding a bit more lemon zest or even a pinch of lemon extract to the filling.
Common mistakes include overbaking the crust or filling, leading to a dry dessert. Keep an eye on the baking times and check for doneness early!
Delicious Variations to Try
Feel free to customize your Limoncello Bars with these creative variations:
- Berry Twist: Add a cup of fresh berries like blueberries or raspberries to the filling for a fruity burst.
- Herb-Infused: Try adding finely chopped basil or mint into the filling for a refreshing herbal note.
- Chocolate Drizzle: Once cooled, drizzle melted white or dark chocolate over the top for a decadent touch.
- Dairy-Free Option: Substitute unsalted butter with coconut oil and use a dairy-free egg substitute to create a dairy-free version.
These variations can keep your baking exciting and allow you to cater to different tastes and dietary needs.
Your Top Questions Answered
Here are some frequently asked questions about Limoncello Bars to help you on your baking journey:
- Can I use bottled lemon juice instead of fresh?
While you can, fresh lemon juice yields a brighter flavor. If you must use bottled, choose a high-quality brand. - Can I make these bars ahead of time?
Absolutely! These bars can be made up to a day in advance. Just store them in the fridge until you’re ready to serve. - What if I don’t have limoncello?
You can substitute limoncello with extra lemon juice or a similar citrus liqueur if desired. - How can I tell when the bars are done?
The bars are done when the filling is set and doesn’t jiggle when you gently shake the pan. - Can I freeze Limoncello Bars?
Yes! They freeze beautifully. Just wrap them well to prevent freezer burn and enjoy up to three months later.