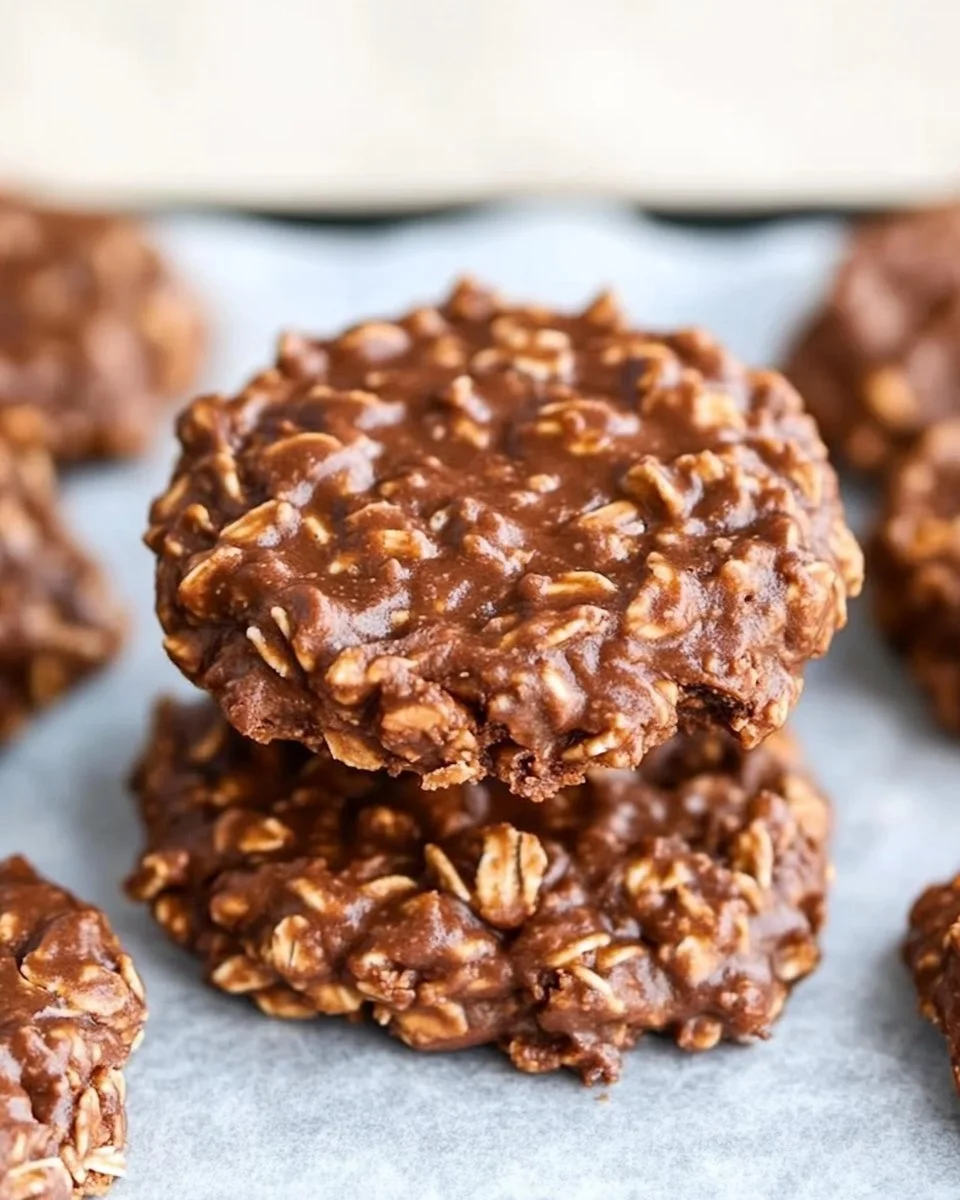
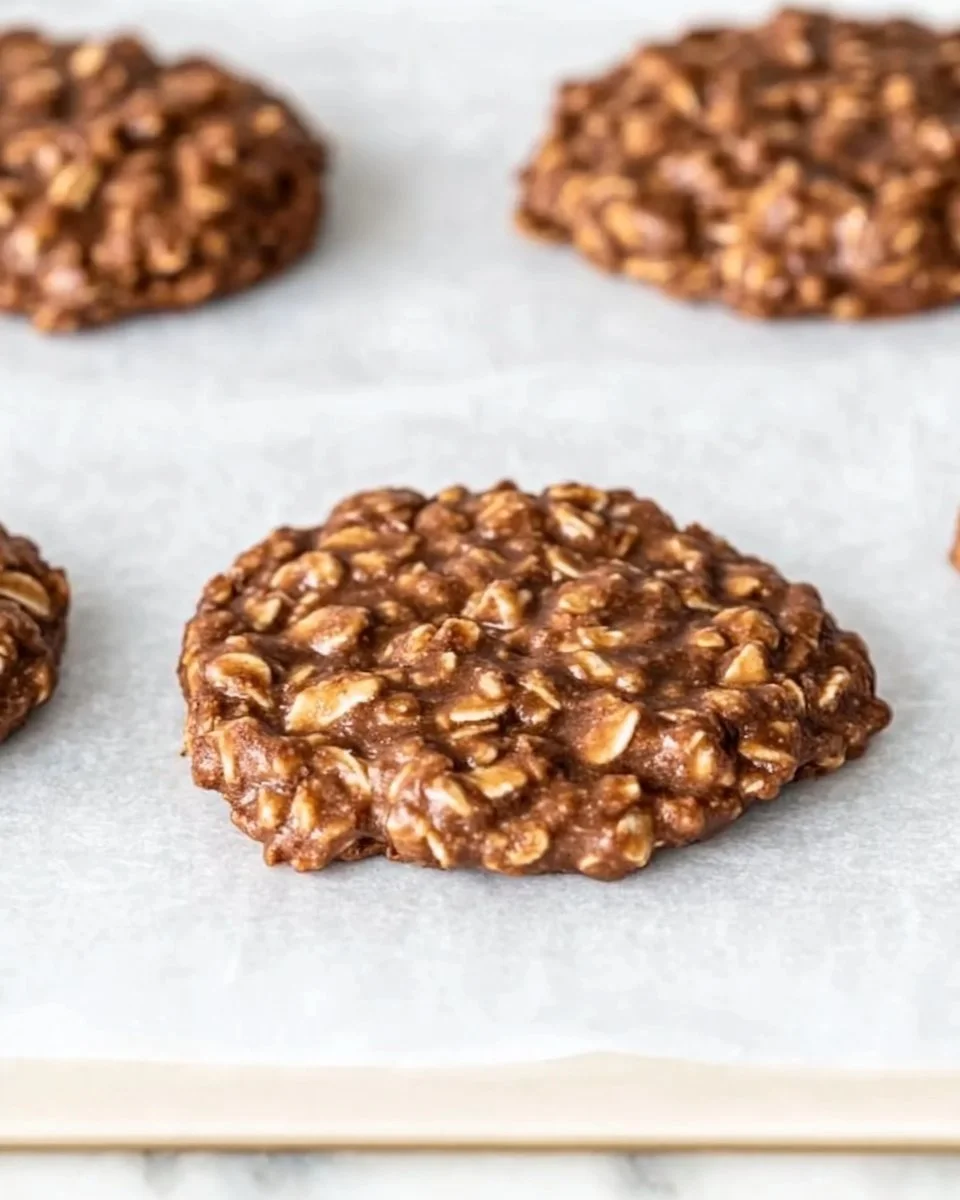
No Bake Cookies are a delightful treat that brings back fond memories of childhood. This easy-to-make dessert is not only delicious but also incredibly quick to prepare, making it a favorite for bakers of all skill levels. With a rich combination of chocolate, peanut butter, and oats, each bite offers a satisfying crunch paired with the sweetness of sugar. What makes these cookies truly special is that there’s no need to turn on the oven, saving both time and energy. If you’re looking for a simple recipe that guarantees comfort and joy in every bite, these No Bake Cookies are a must-try!
Reasons This Recipe Shines
This No Bake Cookies recipe stands out for several compelling reasons. First, it’s extremely easy to make; just a few steps and you’re ready to drop spoonfuls of deliciousness onto wax paper. Second, the baking time is completely eliminated, which is perfect for those warm days when the last thing you want is to heat up the kitchen. Additionally, this recipe is budget-friendly; it utilizes common pantry staples, so you don’t have to break the bank to make something sweet. Lastly, these cookies are versatile; you can customize them based on your preferences or what you have on hand.
Simple Breakdown of the Preparation
Creating No Bake Cookies is as straightforward as it gets. You start by heating some key ingredients in a saucepan, allowing them to meld together into a delicious base. Once everything is combined and smooth, you mix in the oats for texture. The final step is simply dropping spoonfuls of the mixture onto wax paper and letting them cool. It’s a fun process that even young chefs can participate in, making it a wonderful family activity.
Ingredients
- 1/2 cup butter
- 1 3/4 cups granulated sugar
- 1/4 cup unsweetened cocoa powder
- 1/2 cup milk
- 1 teaspoon vanilla extract
- 2/3 cup creamy peanut butter
- 3 cups quick oats
These ingredients are typically found in most kitchens, making this recipe accessible to everyone. The butter serves as the creamy base, while the granulated sugar provides sweetness. Cocoa powder adds a rich chocolate flavor, and peanut butter brings a nutty creaminess that pairs beautifully with the other ingredients. The quick oats lend the final texture that makes these cookies both chewy and satisfying.
Step-by-Step Directions
- In a saucepan over medium heat, combine butter, sugar, cocoa, and milk. Bring the mixture to a boil and let it boil for 1 minute. Be sure to stir frequently to prevent burning.
- Remove the saucepan from heat and stir in the vanilla extract and peanut butter until the mixture is smooth and well-combined.
- Add the quick oats to the mixture and stir until fully incorporated. Make sure all oats are evenly coated with the chocolate-peanut butter mixture.
- Using a spoon, drop spoonfuls of the mixture onto a sheet of wax paper. Space them out to allow for cooling and setting.
- Let the cookies cool completely until set. This usually takes about 30 minutes, depending on the humidity in your kitchen.
As you make these cookies, it’s important to keep an eye on the boiling syrup. Overcooking can lead to hard cookies, while undercooking may prevent them from setting up properly.
Creative Ways to Serve
No Bake Cookies are delicious on their own, but there are several fun ways to serve them that can elevate your dessert game. Pair these cookies with a glass of cold milk for a classic experience. They also make a great addition to any dessert platter, offering a delightful contrast to other baked treats. If you’re hosting a party, consider serving them alongside a scoop of vanilla ice cream for a delectable sundae. For a more festive touch, sprinkle some chopped nuts or mini chocolate chips on top before they set.
Smart Storage Solutions
To keep your No Bake Cookies fresh, store them in an airtight container at room temperature for up to a week. If you’d like to enjoy them longer, you can freeze them; just layer parchment paper between the cookies to prevent sticking. When you’re ready to enjoy them, let the cookies thaw at room temperature. They’re best served fresh, but freezing does maintain their taste and texture quite well.
Essential Cooking Tips for Success
Here are some handy tips that can help you achieve the best No Bake Cookies: make sure your saucepan is large enough to accommodate the expansion of the mixture as it boils. Avoid rushing the boiling stage; letting it bubble for the full minute helps to create a firmer texture in the final cookie. Finally, if you find the mixture too sticky when trying to drop it, lightly grease your spoon or your hands with a bit of butter or oil.
Fun Variations to Consider
One of the best things about No Bake Cookies is their versatility. If you’re in the mood for something different, you can easily switch out the creamy peanut butter for crunchy peanut butter to add texture. For a nut-free option, try using sun butter or almond butter. If you’re a fan of coconut, consider stirring in some shredded coconut with the oats for an extra layer of flavor. For a more decadent treat, drizzle melted chocolate on top of the cooled cookies, or mix in some mini marshmallows for a s’mores-inspired delight.
Your Questions Answered
- Can I use old-fashioned oats instead of quick oats? While old-fashioned oats can work, they won’t yield the same chewy texture. Quick oats help bind the cookies better.
- How long do these cookies take to set? Generally, they take about 30 minutes to cool and set. However, high humidity might extend this time slightly.
- Can I add other ingredients? Absolutely! You can mix in nuts, chocolate chips, or dried fruit based on your preference for more flavor and texture.
- What should I do if the mixture seems too thin? If the mixture appears too runny, you can cook it for an additional minute to thicken it up before adding the oats.
- How do I know when the boiling stage is finished? The mixture should bubble vigorously and form small bubbles across the entire surface. This usually indicates it’s ready for the next step.