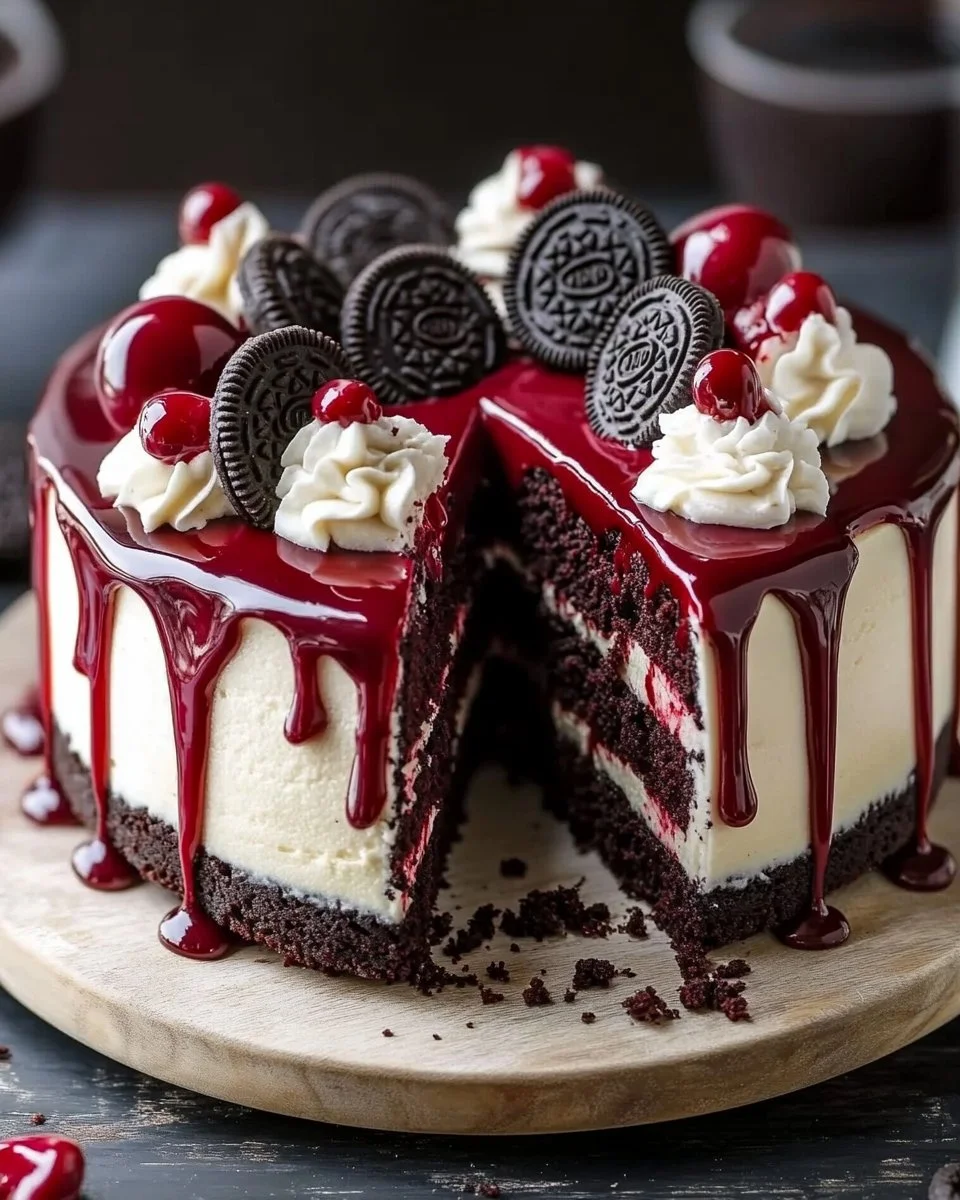
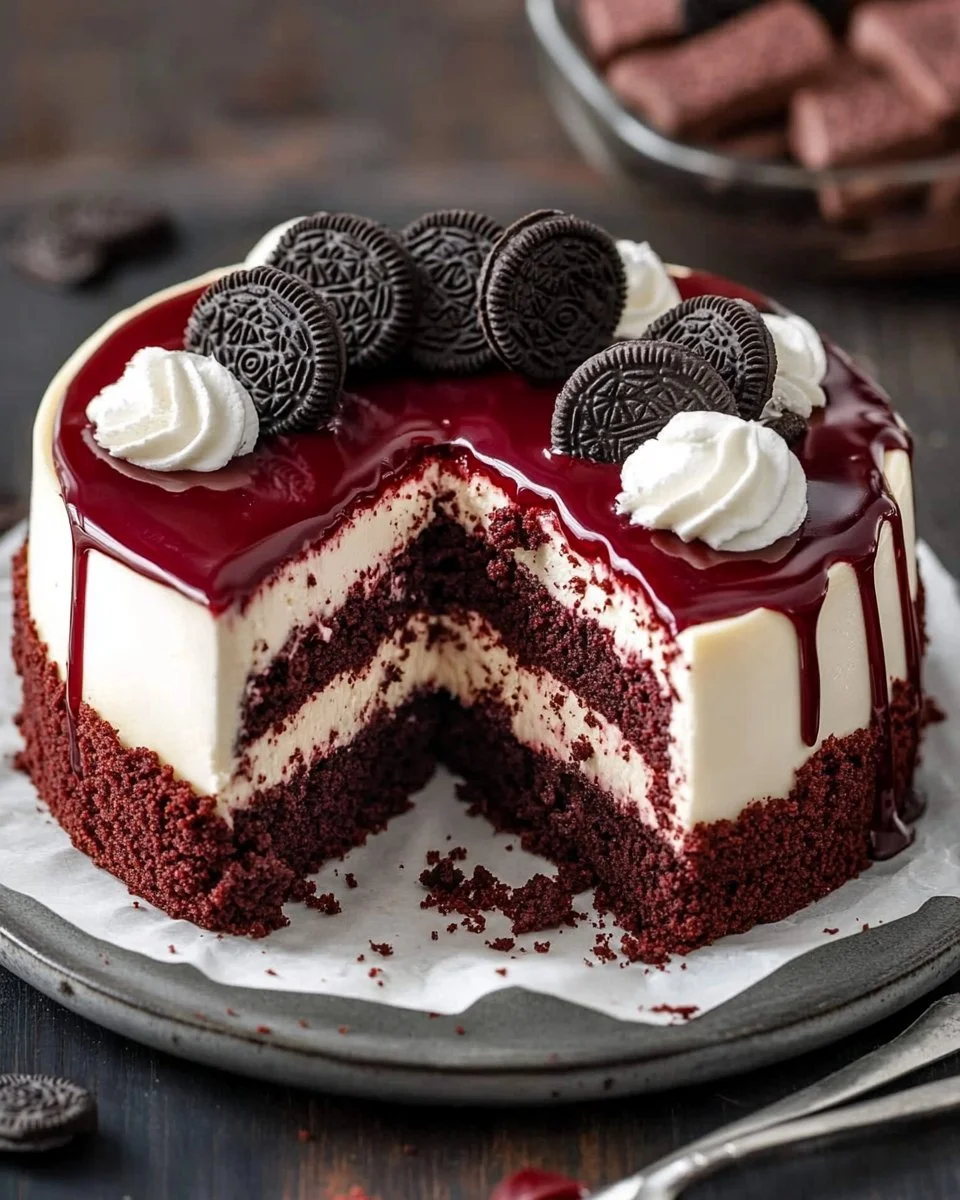
Looking for a show-stopping dessert that’s rich, decadent, and visually stunning? The Red Velvet Cheesecake Drip Cake is just the ticket! This dessert combines the classic flavors of red velvet with a creamy cheesecake filling, all topped off with a luscious chocolate ganache. Perfect for birthdays, anniversaries, or any celebration, this cake not only tastes amazing but also looks beautiful on any dessert table. Get ready to impress your family and friends with a slice of this indulgent treat!
Reasons This Recipe is a Winner
This Red Velvet Cheesecake Drip Cake is a fantastic choice for bakers of all skill levels. Not only is it easy to make, but it also comes together relatively quickly compared to other layered cakes. With just a few key ingredients and straightforward steps, you can create something that looks and tastes like it came straight from a gourmet bakery. Plus, it’s budget-friendly, which means you can serve a luxurious dessert without breaking the bank!
A Simple Breakdown of the Cooking Process
The beauty of this cake lies in its simplicity. You’ll start by preparing a crunchy Oreo crust that sets the stage for the creamy cheesecake batter. After that, you whip up the cheesecake filling, which is flavored with cocoa powder and a splash of vibrant red food coloring. Once everything is baked to perfection and cooled, you’ll finish it off with a silky chocolate ganache. Assemble, drizzle, and garnish for impressive results. Let’s dive into the details!
Ingredients
Gathering the right ingredients is key to a successful cheesecake. Here’s what you’ll need:
- 1 1⁄2 cups Oreo cookie crumbs
- 1⁄2 cup unsalted butter, melted
- 32 oz cream cheese, softened
- 1 cup granulated sugar
- 3 tablespoons all-purpose flour
- 4 large eggs
- 1 teaspoon vanilla extract
- 1/4 cup unsweetened cocoa powder
- Red food coloring
- 1/2 cup crushed Oreos
- 1 cup heavy cream
- 8 ounces semisweet chocolate chips
- Whole Oreo cookies, for garnish
Each ingredient plays an important role; for instance, the cream cheese creates a creamy texture, while the cocoa powder adds that distinct chocolate flavor. The red food coloring gives your cake its characteristic look, making it vibrant and festive!
Step-by-Step Instructions
Let’s walk through the steps to create this stunning Red Velvet Cheesecake Drip Cake:
- Preheat the Oven: Start by preheating your oven to 325°F (165°C). This ensures your cheesecake bakes evenly. Grease and flour a 9-inch springform pan to prevent sticking.
- Prepare the Crust: In a mixing bowl, combine the Oreo cookie crumbs with melted butter. Mix well and then press this mixture firmly into the bottom of the springform pan. This will create a delicious base for your cheesecake.
- Make the Cheesecake Filling: In a large bowl, beat the softened cream cheese and granulated sugar together until the mixture is smooth and creamy. Add in the flour, then mix in the eggs one at a time, ensuring each is well incorporated. Include the vanilla extract, cocoa powder, and a few drops of red food coloring until you achieve your desired shade of red. Finally, gently fold in the crushed Oreos for an added crunch.
- Bake the Cheesecake: Pour the cheesecake batter over the prepared crust. Place in the oven and bake for 60-70 minutes, or until the cheesecake is set but still slightly jiggly in the center. Allow the cheesecake to cool completely at room temperature before refrigerating it for at least 4 hours, or overnight if possible.
- Prepare the Chocolate Drip: To make the chocolate ganache, heat the heavy cream in a small saucepan until it simmers. Remove from heat and add the chocolate chips. Let it stand for 5 minutes, then stir until smooth. Allow it to cool slightly before using it on the cheesecake.
- Assemble the Cake: Drizzle the cooled ganache over the top of the cheesecake, allowing some of it to drip down the sides for that stunning effect. Garnish with whole Oreo cookies placed on top for an extra touch of elegance.
- Helpful Tips: If you want a deeper red velvet flavor, consider swapping the Oreo crust for a red velvet cake mix crust. To avoid cracks in your cheesecake, always use room temperature cream cheese and eggs. If you like a richer taste, dark chocolate chips can be a great substitute for the ganache.
Perfect Pairings and Serving Suggestions
Serving this delightful dessert is easy, and it pairs wonderfully with various accompaniments. Here are some suggestions:
- Serve with a dollop of whipped cream to add lightness
- Fresh berries, such as raspberries or strawberries, provide a lovely contrast
- A scoop of vanilla or chocolate ice cream enhances the dessert experience
- For drinks, pair with a rich cup of coffee or a chilled glass of milk to balance the sweetness
- This stunning cake is perfect for special occasions, holidays, or as a treat for loved ones who deserve something extraordinary.
How to Store Leftovers
Storing your cheesecake properly is essential to maintain its freshness and flavor. Here’s how:
- In the Refrigerator: The cheesecake can be stored in an airtight container or covered tightly with plastic wrap for up to 5 days. If it’s already garnished, it’s best to consume it within a day or two.
- In the Freezer: For longer storage, you can freeze slices of the cheesecake. Wrap individual slices tightly in plastic wrap and then place them in a freezer-safe container. They can be frozen for up to 3 months. Thaw in the refrigerator before serving.
Expert Cooking Tips
Everyone can benefit from a few cooking tricks! Here are some pro tips to ensure your cheesecake turns out perfect:
- Make sure your cream cheese is softened at room temperature for easy mixing and a smooth texture.
- Don’t overmix your batter; it can incorporate too much air, leading to cracks during baking.
- When baking, placing a shallow pan filled with hot water at the bottom of the oven can help create a moist environment that minimizes cracking.
- Always let the cheesecake cool completely before refrigerating to prevent condensation.
Delicious Variations to Try
Customization can take your cheesecake to new heights. Consider these variations:
- For a chocolate lover’s twist, add mini chocolate chips to the cheesecake batter.
- Try incorporating a layer of raspberry or strawberry jam for fruity brightness.
- Substitute the crushed Oreos with chocolate wafer cookies for a different flavor profile.
- Use flavored extracts, such as almond or coffee, instead of vanilla for a unique twist.
Common Questions Answered
Got questions? Here are some frequently asked ones about this delightful cake:
- Can I make this cheesecake in advance? Absolutely! In fact, it tastes even better when made a day ahead.
- Why is my cheesecake cracking? This usually happens from overmixing or baking at too high a temperature. Make sure your ingredients are at room temperature before mixing.
- Can I use low-fat cream cheese? While you can, the texture may be affected, resulting in a less creamy cheesecake.
- How do I know when my cheesecake is done baking? The edges should be set, and the center will look slightly jiggly but not wet. It will continue to firm up while cooling.
- What’s the best way to cut my cheesecake? Use a sharp, warm knife to get clean slices. Wipe the knife with a damp cloth between cuts for neat slices.