Introduction
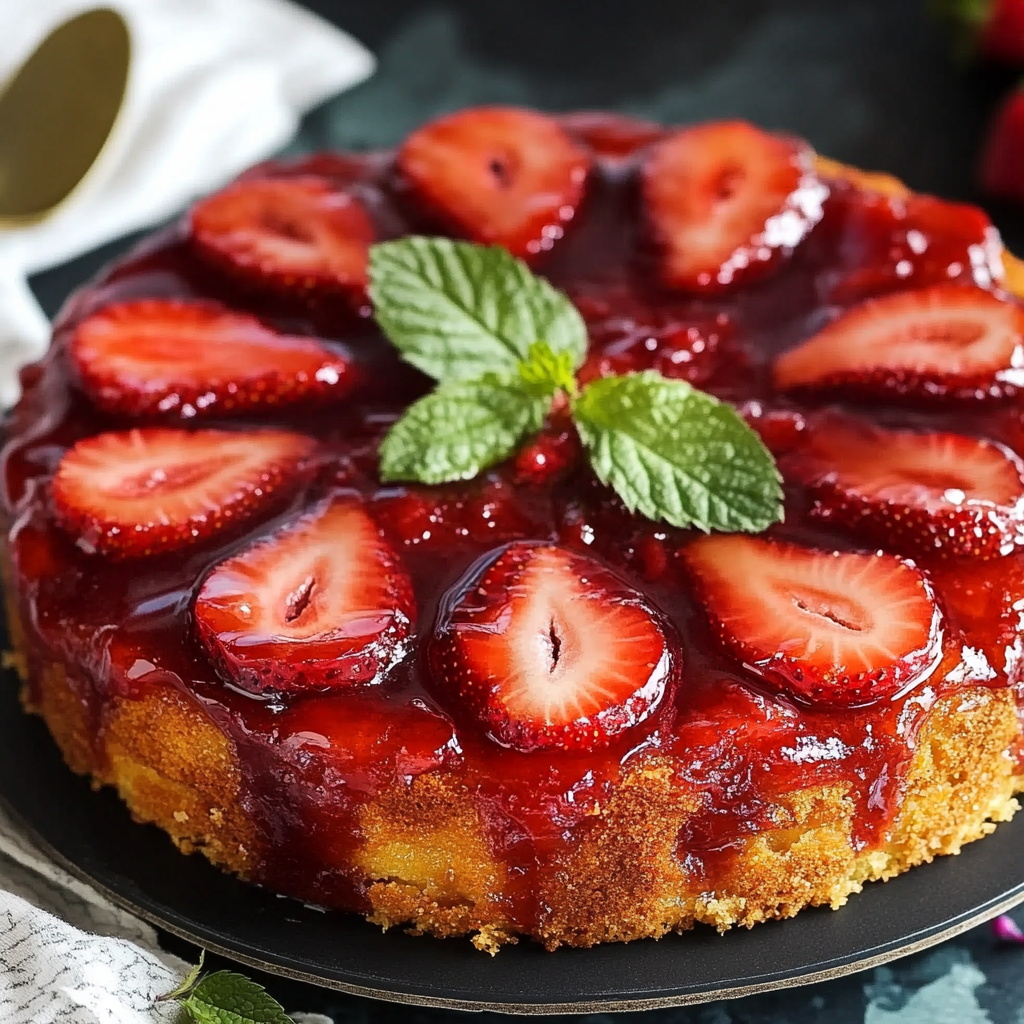
Have you ever had a dessert that instantly reminded you of summer sunshine? That’s exactly what a Strawberry Upside-Down Cake feels like — warm, sweet, and full of comfort. Imagine flipping a cake and revealing a glossy layer of caramelized strawberries glistening like jewels on top. It’s the perfect blend of soft buttery cake and sweet-tart fruit that melts in your mouth.
This Strawberry Upside-Down Cake Recipe is simple to make yet looks and tastes like something straight out of a bakery. Whether you’re a baking beginner or an experienced home cook, you’ll love how effortlessly it comes together.
Let’s dive into every step and secret that makes this cake the star of any table!
1. What Makes This Strawberry Upside-Down Cake Special
What makes this dessert stand out isn’t just the juicy strawberries or the rich buttery base — it’s the magic moment when you flip the cake. The caramelized sugar blends with the fruit juices, creating a golden glaze that looks too beautiful to eat (but you won’t be able to resist!).
It’s like a classic pineapple upside-down cake, but with a fresh twist. Strawberries add a bright, tangy flavor that perfectly balances the sweetness.
2. Ingredients Overview
The ingredients are simple pantry staples — nothing fancy, nothing hard to find. You probably already have most of them in your kitchen!
We’ll divide them into two sections: one for the topping and one for the cake itself.
3. For the Topping
Here’s what you’ll need:
2 cups fresh strawberries, hulled and sliced
½ cup unsalted butter
¾ cup granulated sugar
The topping forms that glossy, sweet strawberry layer that makes this cake so special. The butter and sugar caramelize beautifully, giving you that golden finish once the cake is inverted.
4. For the Cake
These ingredients make the cake light, fluffy, and buttery:
1 ½ cups all-purpose flour
2 teaspoons baking powder
¼ teaspoon salt
½ cup unsalted butter, room temperature
1 cup granulated sugar
2 large eggs
1 teaspoon vanilla extract
½ cup whole milk
Each ingredient plays a key role. The baking powder ensures the cake rises nicely, while the vanilla adds that comforting homemade aroma.
5. Step-by-Step Instructions
Let’s go through the process step by step so you can bake with confidence.
6. Preparing the Topping
Preheat the oven to 350°F (175°C).
Grease a 9-inch round cake pan to ensure nothing sticks.
Melt butter in a medium saucepan over medium heat.
Add sugar and stir until it’s dissolved and bubbly (about 2–3 minutes).
Pour this mixture into the prepared cake pan, spreading evenly.
Arrange strawberries in a single layer over the butter-sugar mixture.
This step sets the stage for the beautiful caramelized topping that gives the cake its name.
7. Making the Cake Batter
Whisk together flour, baking powder, and salt in a bowl.
In another bowl, cream the butter and sugar until light and fluffy.
Add eggs one at a time, beating well after each.
Mix in vanilla extract.
Alternate adding the flour mixture and milk — start and end with flour.
Beat until just combined (don’t overmix).
The batter should be smooth but not too thick. Think of it like mixing sunshine and clouds — light, airy, and perfect.
8. Baking the Cake Perfectly
Pour the batter over the strawberries in the cake pan.
Spread evenly with a spatula.
Bake in the preheated oven for 45–50 minutes, or until a toothpick inserted in the center comes out clean.
The aroma will fill your kitchen with buttery sweetness — a sure sign your cake is almost ready.
9. Inverting and Serving Tips
Cool the cake in the pan for 10 minutes after baking.
Run a knife around the edges to loosen it.
Place a serving plate over the pan and carefully invert.
Lift the pan gently to reveal your glistening strawberry topping.
Let it cool completely before serving to allow the topping to set.
10. Variations and Creative Twists
Want to make this recipe your own? Try these fun ideas:
Add a hint of lemon zest to the batter for brightness.
Mix in blueberries or raspberries with the strawberries for a berry medley.
Use brown sugar instead of white for a deeper caramel flavor.
Serve with whipped cream or vanilla ice cream for extra indulgence.
Think of this cake as your canvas — the strawberries are just the beginning!
11. Common Mistakes to Avoid
Even simple recipes have a few traps. Avoid these for the best results:
Using cold butter — it won’t cream properly.
Overmixing the batter — makes the cake dense.
Not greasing the pan well — causes sticking when you invert.
Skipping the 10-minute cooling step — the topping might slide off.
Remember: patience is key when baking.
12. How to Store and Reheat
You can store leftovers (if there are any!) easily:
Room temperature: up to 2 days in an airtight container.
Refrigerator: up to 5 days.
Freezer: up to 2 months, wrapped tightly in plastic and foil.
To reheat, pop a slice in the microwave for 10–15 seconds. The butter melts slightly, and it tastes freshly baked again.
13. Serving Suggestions
This cake is perfect on its own, but if you want to elevate it:
Serve with a dollop of whipped cream.
Add a scoop of vanilla ice cream on warm slices.
Sprinkle with powdered sugar for a festive look.
Pair with iced coffee or hot tea for a cozy afternoon treat.
It’s also an excellent brunch dessert — not too sweet, but just right.
14. Why You’ll Love This Recipe
This Strawberry Upside-Down Cake Recipe combines simplicity, flavor, and nostalgia. You don’t need fancy equipment or complicated steps. Each bite tastes like a mix of sunshine, butter, and fresh strawberries.
It’s a recipe that feels homemade, comforting, and full of love — the kind that brings family and friends together around the table.
15. Final Thoughts
If happiness had a flavor, it might just be this Strawberry Upside-Down Cake. Simple ingredients, easy steps, and a stunning finish — that’s all you need to create something unforgettable.
So next time you want to impress guests (or just treat yourself), flip the script — literally — and bake this beauty.
FAQs
1. Can I use frozen strawberries for this Strawberry Upside-Down Cake Recipe?
Yes, but thaw and drain them first to remove excess moisture. Too much liquid can make the topping soggy.
2. Can I make this cake ahead of time?
Absolutely! Bake it a day before, cool completely, and store in the fridge. Bring to room temperature before serving.
3. What other fruits can I use instead of strawberries?
You can substitute peaches, pineapples, or mixed berries. Just make sure they’re sliced thinly for even caramelization.
4. How do I prevent the cake from sticking when flipping it?
Grease the pan generously and let the cake cool for about 10 minutes before inverting.
5. Can I make this recipe dairy-free?
Yes! Substitute butter with coconut oil or vegan butter, and use almond or oat milk instead of whole milk.